
Welcome to our Ultimate Guide on Bird of Paradise Plant Care Indoors.
I’m Juliette, the owner of a well-known indoor plant shop and plant maintenance company right here in the heart of New York City.
For over 13 years, my team and I have dedicated ourselves to assisting thousands of individuals in our busy city with the care of their plants and enhancing their spaces with vibrant and beautiful greenery.
Our journey has taken us through the leafy wilderness of countless species, each with its own story, needs, and beauty. But out of all these plants, one has consistently caught our attention with its unique look and beautiful tropical leaves – the Bird of Paradise.
Crafting the perfect care guide for such a majestic plant hasn’t been a simple task.
It’s been a journey filled with passion and skill, stemming from the practical know-how of not just one enthusiast, but a team of seasoned plant maintenance professionals.
Together, we’ve cared for thousands of these tropical beauties in homes and offices across New York City, learning their secrets and understanding their language.
This guide isn’t just another piece of online plant care advice. It’s a detailed document created from years of professional experience and true passion.
My goal is for this guide to be your main resource, a companion in your journey of caring for your Bird of Paradise plant that evolves along with you.
From simple watering and lighting tips to advanced fertilization and pest control techniques, each piece of advice is designed to assist you in creating a flourishing indoor sanctuary.
I invite you to bookmark this guide, not just as a resource, but also as your gateway to our community of plant enthusiasts and professionals.
Let’s work together to ensure that the Bird of Paradise plants thrive indoors, adding a touch of tropical splendor to your life.
Understanding Bird of Paradise plants
The Bird of Paradise plant, with its vibrant, crane-like flowers, brings a touch of the tropics to your indoor garden.
Named for its resemblance to the exotic birds of paradise, this plant’s brilliant blooms and large, lush leaves can add a statement to any room.
I must confess, here on the East Coast of the United States, neither I, my team, nor any of our thousands of customers have ever witnessed a Bird of Paradise plant in bloom.
Unlike us, those living on the West Coast seem to have better luck, often sharing in the comments on our YouTube channel how their Bird of Paradise plants bloom yearly, and sometimes even twice a year.
Caring for a Bird of Paradise plant involves providing it with what it needs to thrive: adequate light, proper watering, fertilizer, and the perfect temperature. It’s about achieving the right balance to mimic its natural tropical habitat.
By following the care tips below with patience and careful attention, you will be able to enjoy the full beauty of the Bird of Paradise plant in your own home.
Species overview
Strelitzia is a genus of plants native to South Africa, commonly known as Bird of Paradise plants.
Species that are popular as indoor plants are Strelitzia Reginae, known as the common Bird of Paradise or Crane Flower, and Strelitzia Nicolai, often referred to as the White or Giant Bird of Paradise.
These species are members of the plant family Strelitziaceae and are known for their robust size and distinctive foliage.
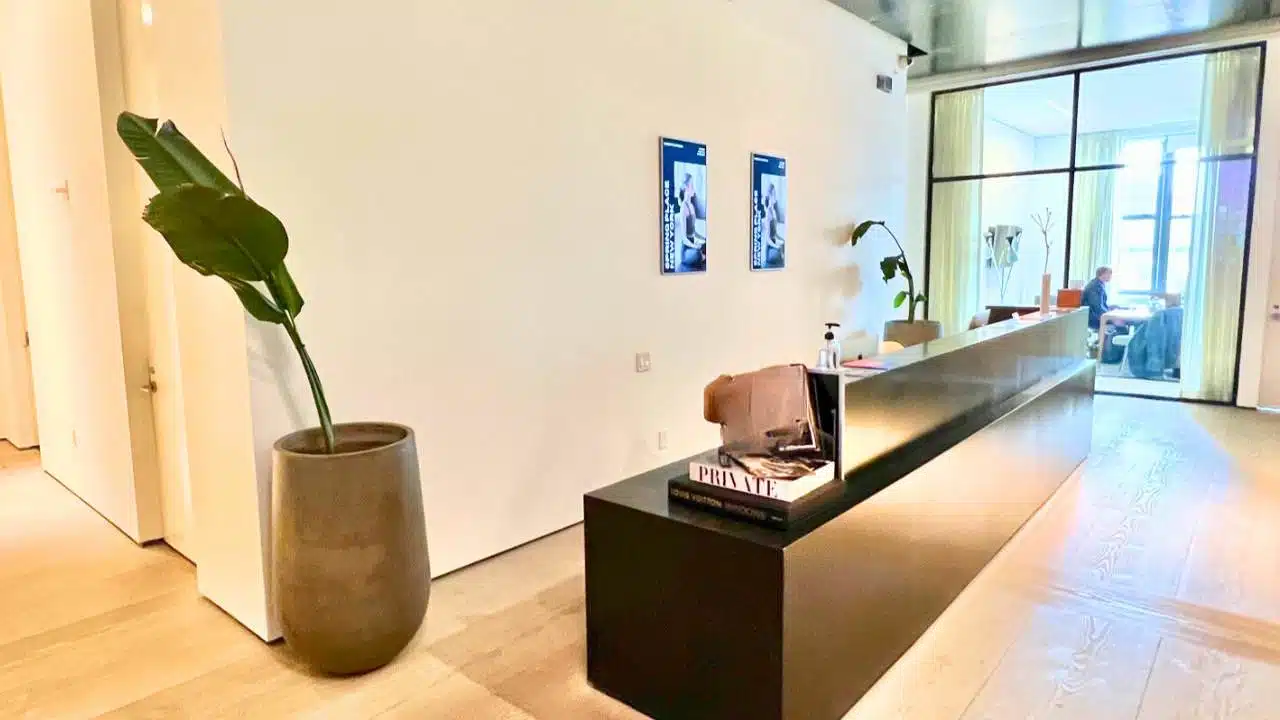
The Bird of Paradise species most often found in plant shops across the United States is the Strelitzia Nicolai. It has also been a favorite among my customers for years, and we’ve delivered thousands of these plants to our fellow New Yorkers.
Over the years, I’ve partnered with numerous growers and nurseries in Florida, New Jersey, and New York to find the healthiest and most attractive plants.
Despite the Bird of Paradise plant being relatively easy to grow, the quality and health significantly vary from one grower to another. This made it crucial for my business to learn how to distinguish between healthy and unhealthy Bird of Paradise plants.
Regardless of whether you’re buying your plants from Home Depot, Ikea, your local plant shop, or ordering Bird of Paradise plants online, it’s important to know the main signs that indicate a healthy or not healthy plant.
Signs of a healthy Bird of Paradise plant
A healthy Bird of Paradise plant will display:
- Vibrant green, glossy leaves
- Sturdy and upright stems
You’ll observe new growth, typically unfurling from a horizontal spathe, indicating the plant is flourishing indoors.
Signs of unhealthy Bird of Paradise plant
Signs of unhealthy Bird of Paradise plant:
- Brown or yellowing leaves
- Limp, drooping leaves
- Slow growth
- Struggling to unfurl new leaves
These symptoms can signal issues with fungus, lighting, temperature, humidity, watering, or pests.
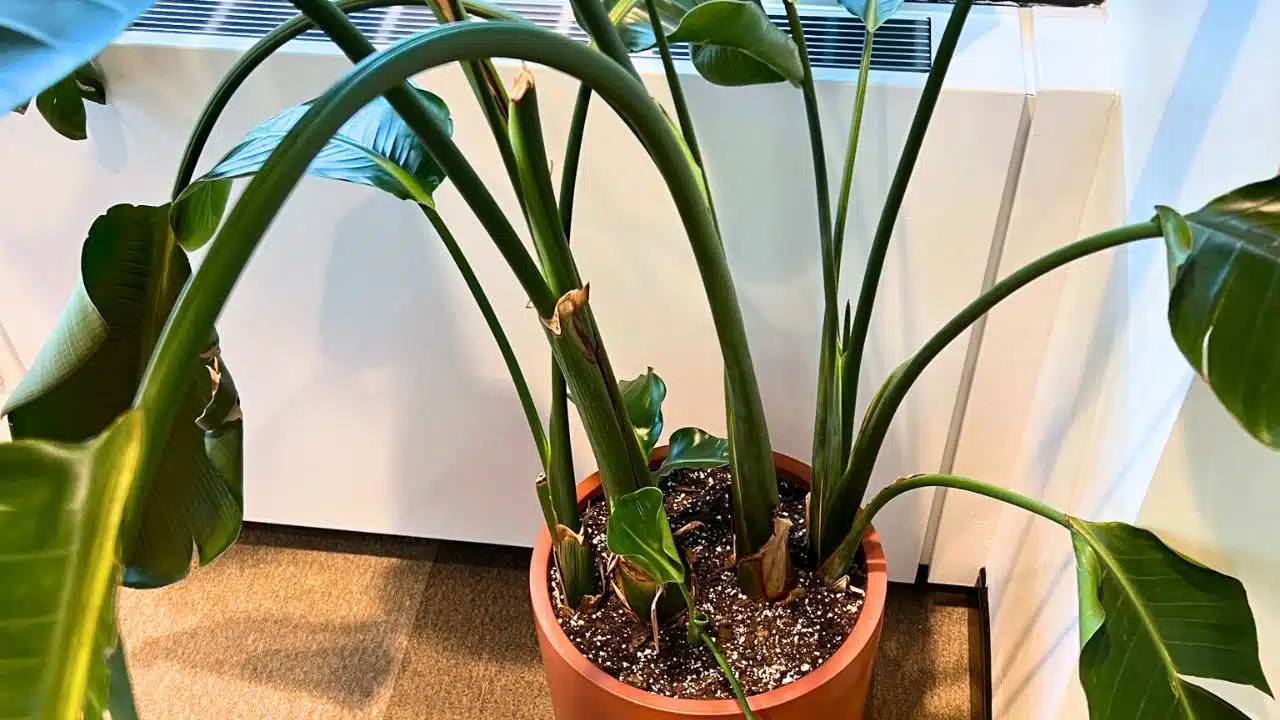
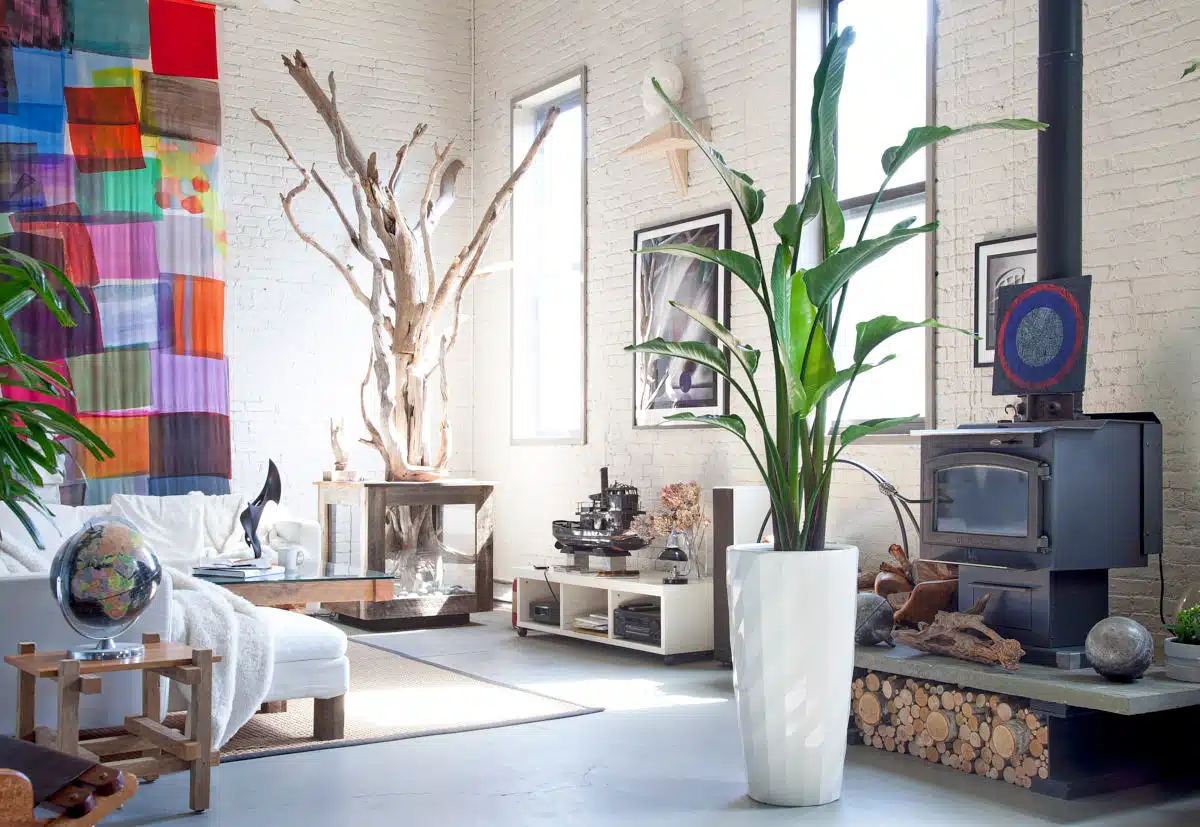
How fast Bird of Paradise plants grow indoors
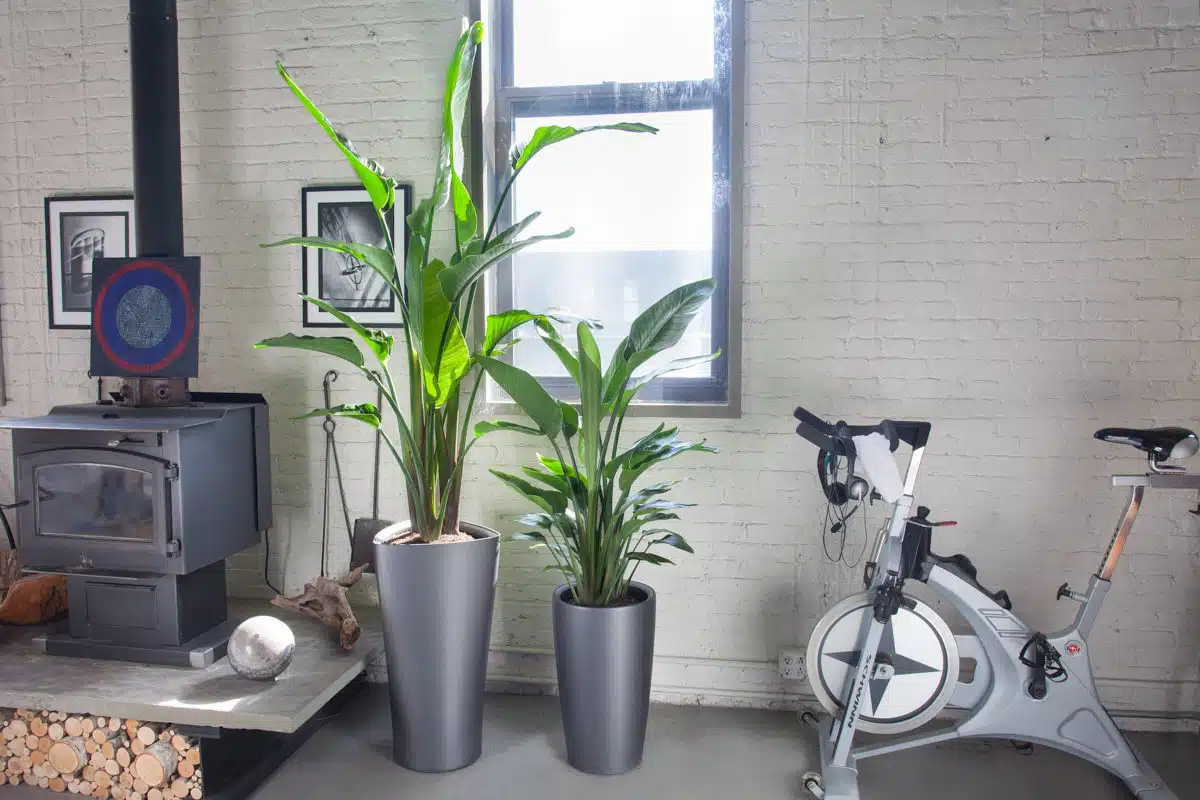
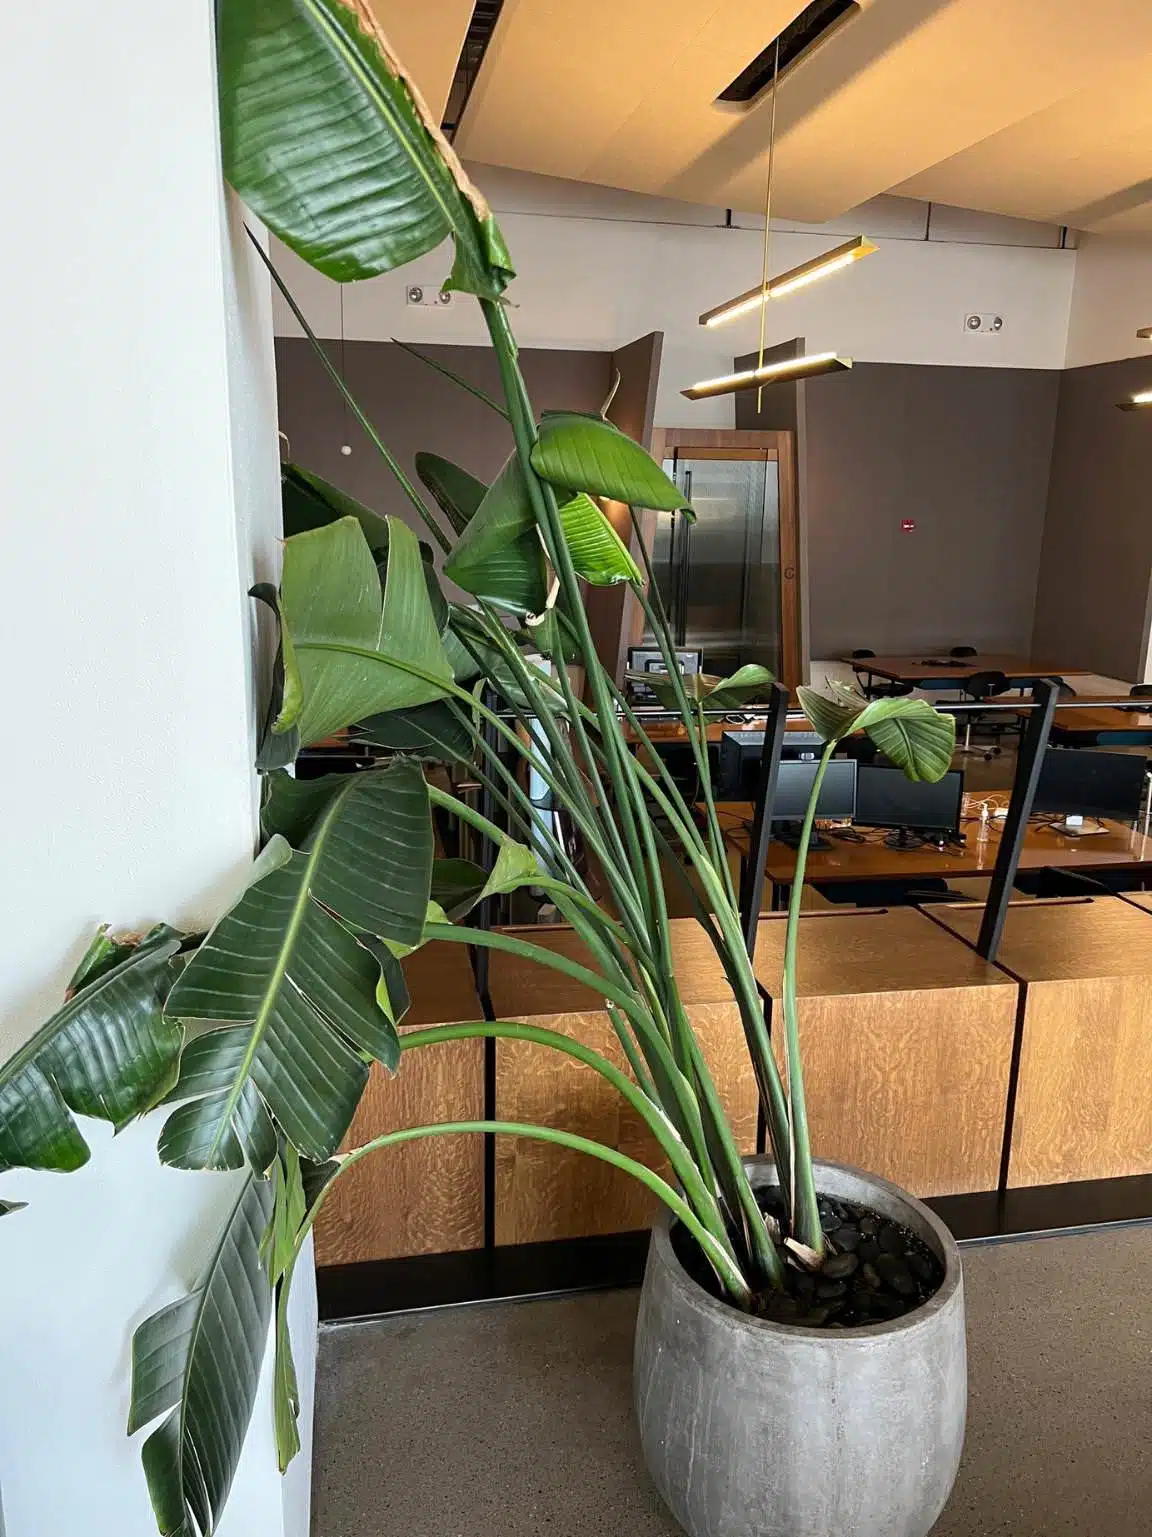
Indoors, Bird of Paradise plants grow at a moderate rate, often reaching 5-12 feet within a few years, with proper care.
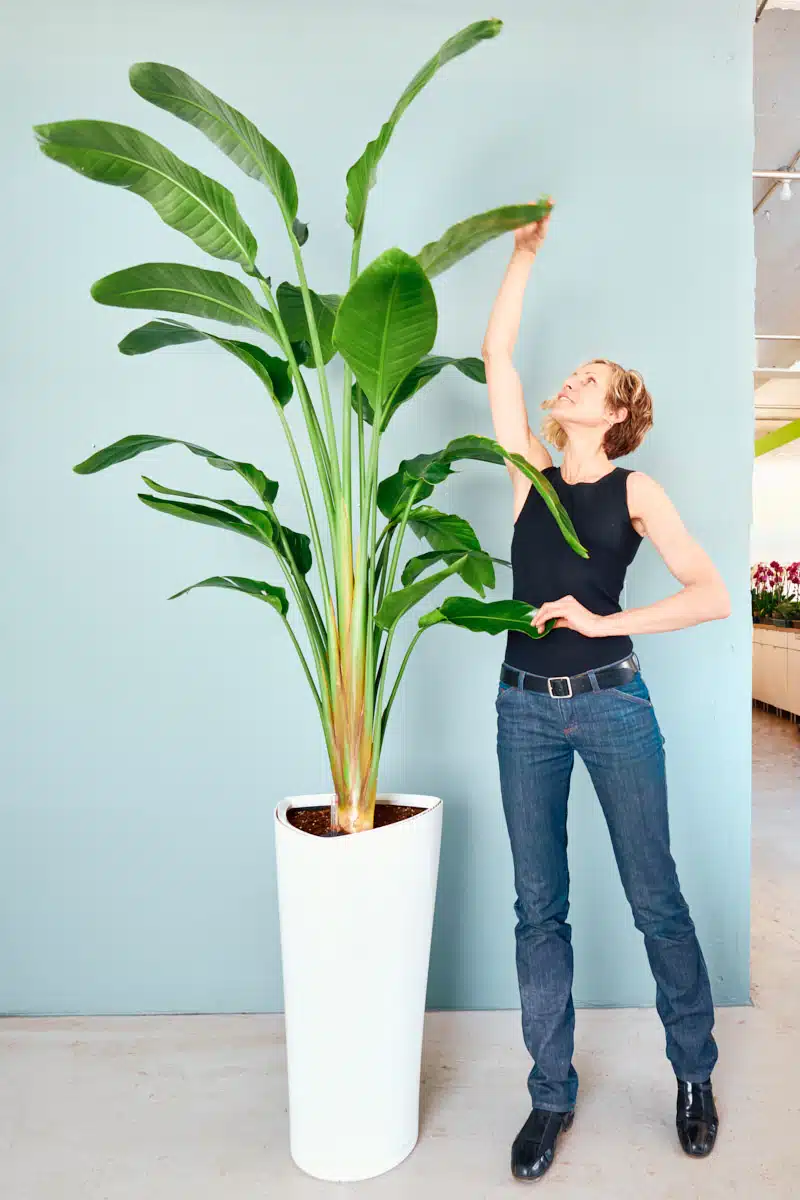
I always recommend to my customers to select a roomy corner or a wide open area for their Bird of Paradise plant.
Monitoring its growth carefully is essential, as these plants can flourish and expand quickly when provided with the appropriate environment and care.
It’s important to maintain regular pruning, rotate the plant frequently, and repot it every 2-3 years to keep these plants in shape and healthy.
How often can I expect my Bird of Paradise plant to produce new leaves
The frequency at which a Bird of Paradise plant shoots out new leaves can vary depending on various factors such as environmental conditions, age of the plant, and overall health. Typically, under optimal growing conditions, a Bird of Paradise plant may produce new leaves every few weeks to months.
However, this can vary, and it’s not uncommon for new leaves to emerge less frequently, especially during periods of dormancy or when the plant is not actively growing.
How often can I expect my Bird of Paradise plant to produce blooms
Bird of Paradise plants typically bloom intermittently throughout the year, especially during their growing season, which is typically in the spring and summer months.
However, the frequency of blooming can vary depending on various factors such as the plant’s age, health, growing conditions, and care provided. In optimal conditions, a Bird of Paradise plant may produce blooms several times a year, with each flower cluster lasting for several weeks.
However, it’s not uncommon for the plant to bloom less frequently, particularly in indoor settings where conditions may not perfectly mimic its native habitat.
As I mentioned before, if you’re on the East Coast of the United States or somewhere with a similar climate, don’t expect your Bird of Paradise to bloom. Instead, enjoy the beauty of its paddle-shaped leaves and, who knows, maybe our green thumb gods will surprise you with a miraculous bloom one day 🤞
Optimal growing conditions
Most of the Bird of Paradise plants you see in stores across the United States are grown in sunny Florida. So you need to create similar conditions in your space. This includes adequate light, consistent warmth, proper watering frequency, and sufficient humidity.
To successfully grow a Bird of Paradise plant, you’ll need to provide conditions that mimic its native tropical environment.
Light requirements

Bird of Paradise plants prefer bright, indirect light for optimal growth.
They can tolerate some direct sunlight, especially during the morning hours (east-facing window), but too much direct sunlight can scorch their leaves.
Placing them near a south or west-facing window where they can receive bright, indirect light is ideal.
Overall, maintaining consistent, bright light conditions is essential for the health and flowering of Bird of Paradise plants.
Temperature
These tropical plants prefer a warm and humid atmosphere.
The ideal temperature range is between 65-80°F during the day and not dipping below 50-54°F at night. It is best to maintain a consistent temperature to prevent shock.
Humidity
The ideal humidity for growing the Bird of Paradise plant indoors is 40% – 60%.
Supplement humidity by placing a humidifier nearby or a pebble tray with water beneath the plant.
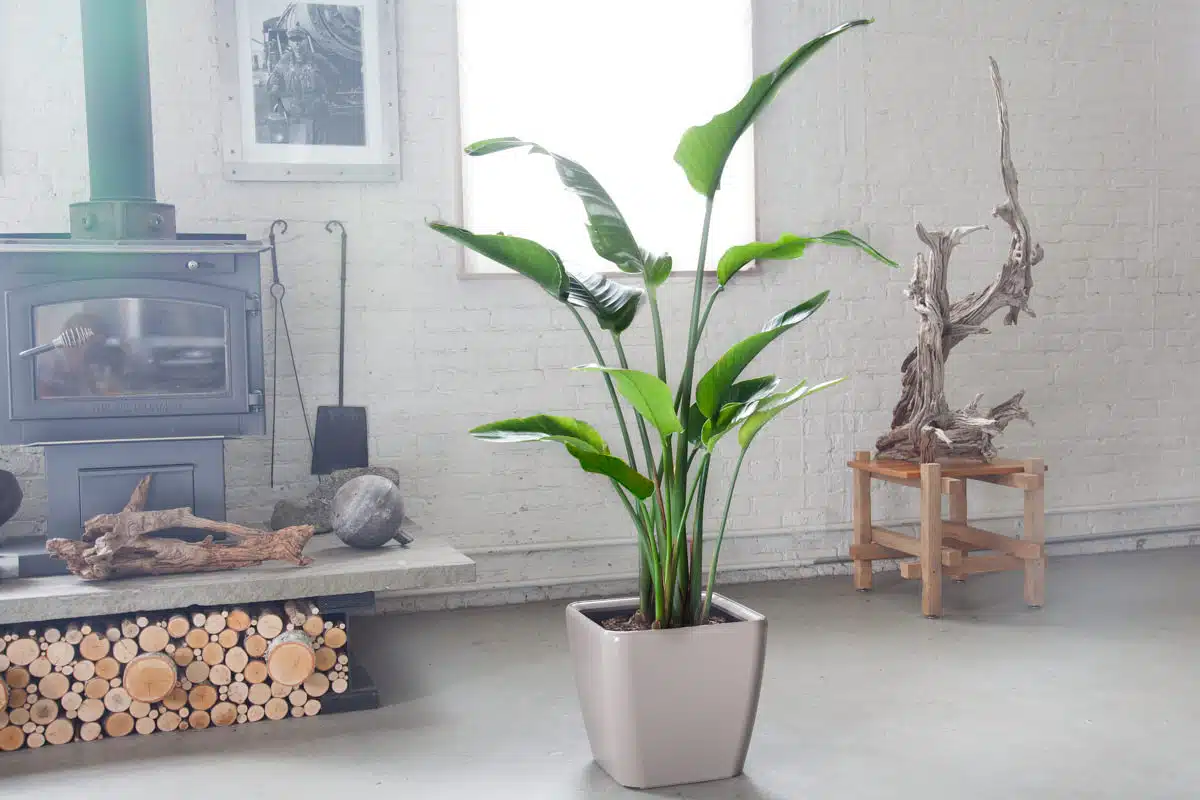
Space requirements
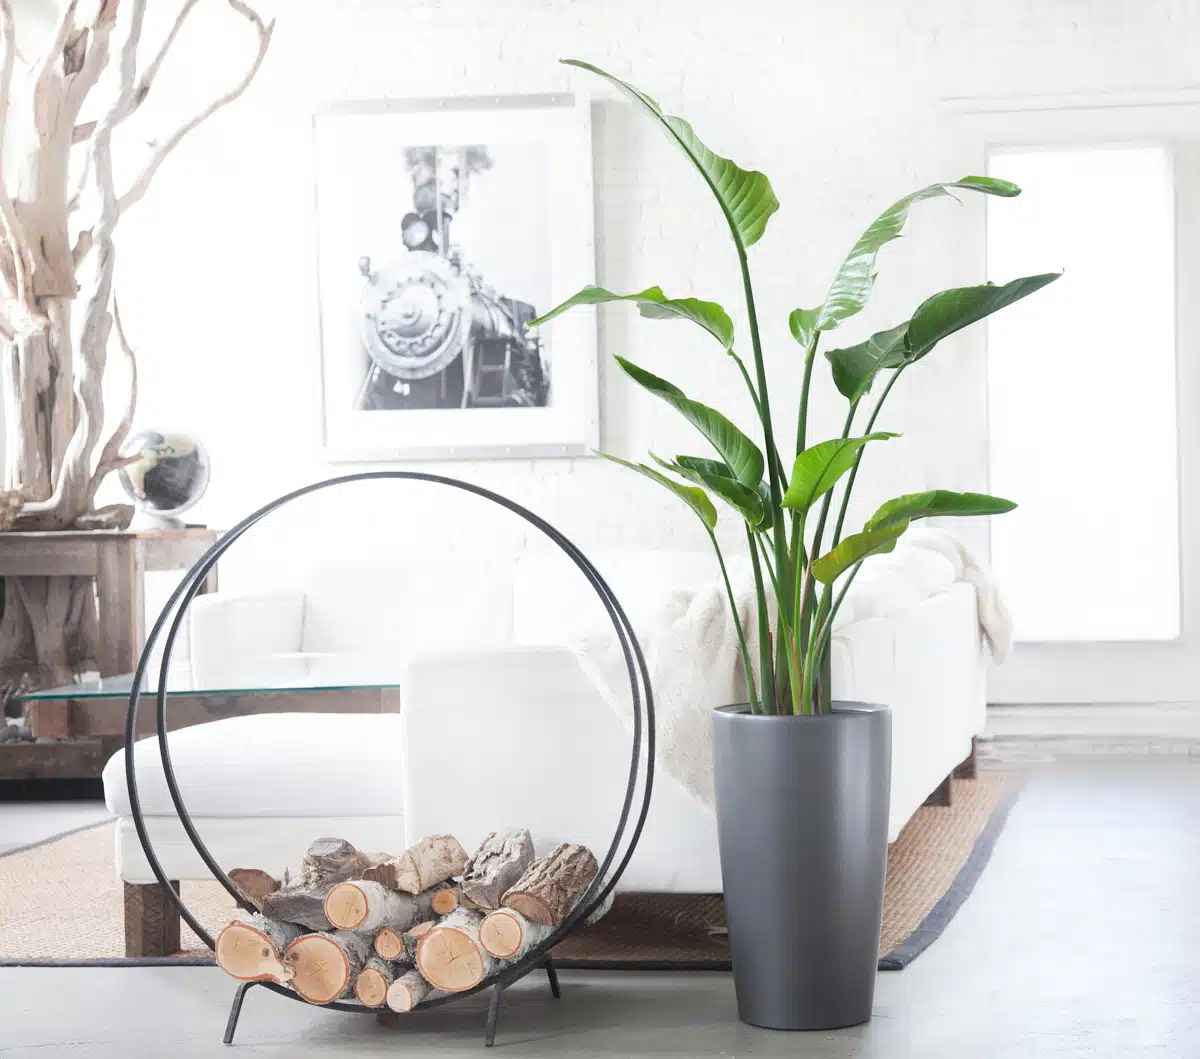
Bird of Paradise plants (Strelitzia) require space around and above them to grow properly.
They have large, broad leaves that need room to spread out, and their height can reach up to 12 feet.
Providing about 2-3 feet of space around and above the plant allows it to grow freely without being crowded or inhibited by other plants or obstacles. This spacing also ensures proper air circulation and light exposure, which are essential for the plant’s health and growth.
Importance of rotation
Rotate your Bird of Paradise periodically to ensure even growth.
I can’t emphasize enough how crucial it is to regularly rotate your plants, especially the Bird of Paradise. These plants get pretty big, and regular rotation will prevent your plant from leaning towards the light, promoting a more full and symmetrical growth.
How to water Bird of Paradise plants
Bird of Paradise plants prefer consistently moist soil, but it’s crucial not to let the soil become waterlogged or saturated. While they do enjoy moist conditions, allowing the soil to dry slightly between waterings prevents issues like root rot.
Striking a balance between keeping the soil consistently moist and avoiding waterlogged conditions is key to maintaining the health of Bird of Paradise plants.
It’s crucial to adjust your watering technique based on the type of planter you’re using to ensure optimal moisture levels for the plant.
I’ll go over watering techniques for the most common types of planters, but first, let’s discuss something I believe is crucial in plant care and watering: checking the soil’s moisture level before watering.

Overwatering or underwatering is the sure way to accidentally kill your plants.
You know, it surprises me sometimes how many folks don’t realize how crucial it is to check the soil’s moisture before watering. I’ve noticed both beginners and seasoned plant lovers sticking to a strict watering schedule, without considering the change of seasons or the environment in their home.
Take winter, for example. We crank up the heat to stay cozy, but that makes the indoor plant soil dry out quicker, meaning our green friends need watering more often. Then in summer, the AC keeps us cool but slows down soil drying, so plants don’t need to be watered as often.
That’s why I’m always drumming it into everyone: always, always check the soil moisture before you water. It simply must be done every time you grab that watering can.
How to properly test the soil before watering
To properly test the soil before watering, you can use either your finger or a soil moisture meter:
- Finger test: Insert your finger into the soil near the plant’s base, as deep as possible. Feel the soil’s moisture level: if it feels dry to the touch, it’s time to water. If it still feels moist, hold off on watering until the soil dries out further.
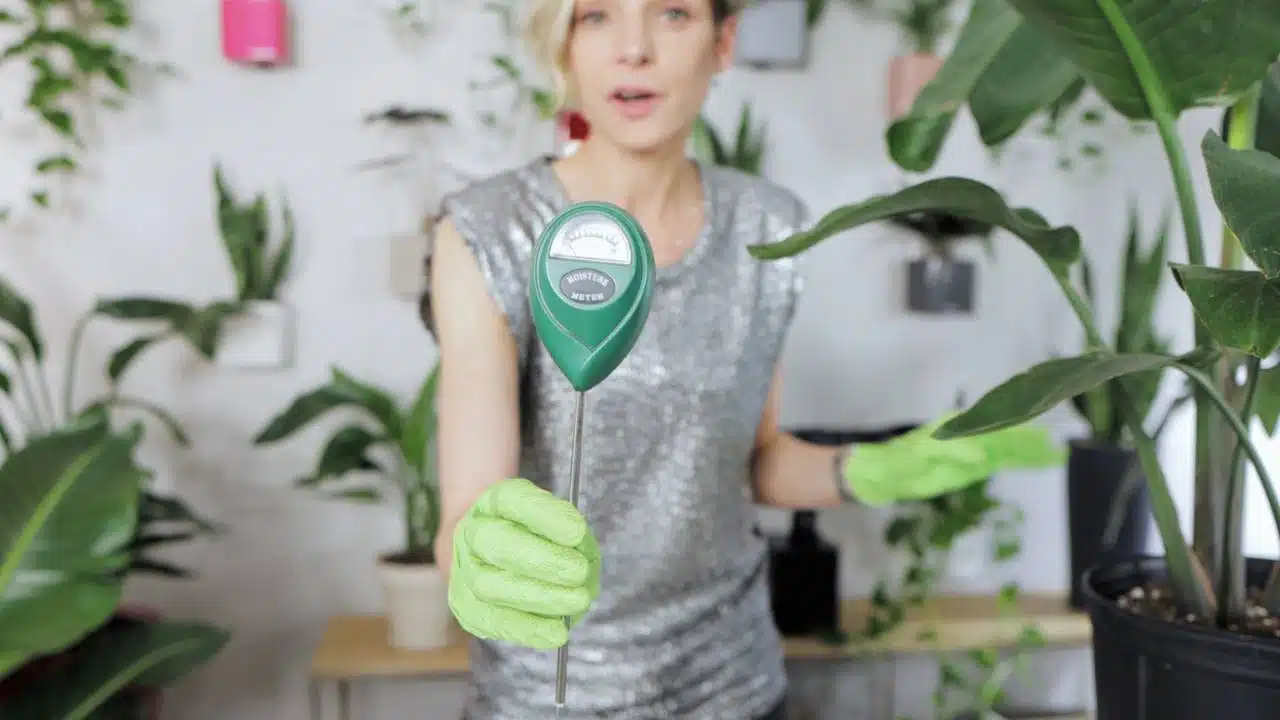
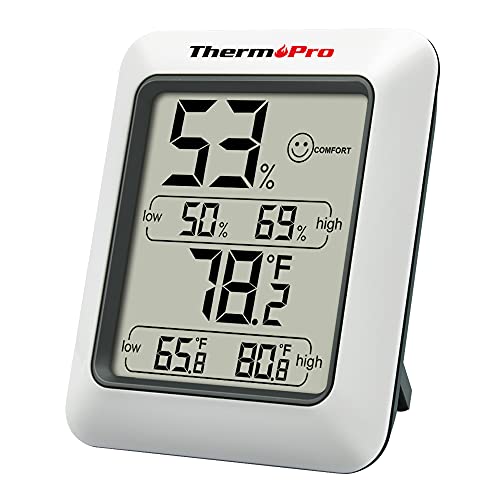
- Soil moisture meter: Alternatively, you can use a soil moisture meter. This is my go-to tool for checking soil moisture level, hands down. Insert the probe of the moisture meter into the soil near the plant’s base, going as deep as possible without hitting the bottom of the pot. The meter will provide a reading indicating the soil’s moisture level. If the reading is in the 4-5 moisture zone or below, it’s time to water your Bird of Paradise plant. If the soil is still moist, wait until the next check to water.

Both methods provide effective ways to gauge the soil’s moisture level and determine whether watering is necessary. Choose the method that works best for you and your plants.
Now that you understand the importance of checking soil moisture before watering, let’s dive into watering techniques for Bird of Paradise plants.
I will cover watering techniques for four types of pots: Lechuza self-watering planters, pots with drainage (such as traditional clay pots), plants in decorative cache pots, and plants that are kept in their nursery pots.
How to water Bird of Paradise plants in Lechuza planters
Lechuza planters feature a built-in water reservoir, which drastically reduces the frequency of watering. This self-watering system empowers the plant to control its water intake, ensuring a consistent moisture level that is suitable for Bird of Paradise plants.
Test the soil as deeply as possible and if it’s dry enough (soil moisture meter reading for Bird of Paradise plants should be between 4 and 5 zones), fill the reservoir until the indicator reaches the maximum level.
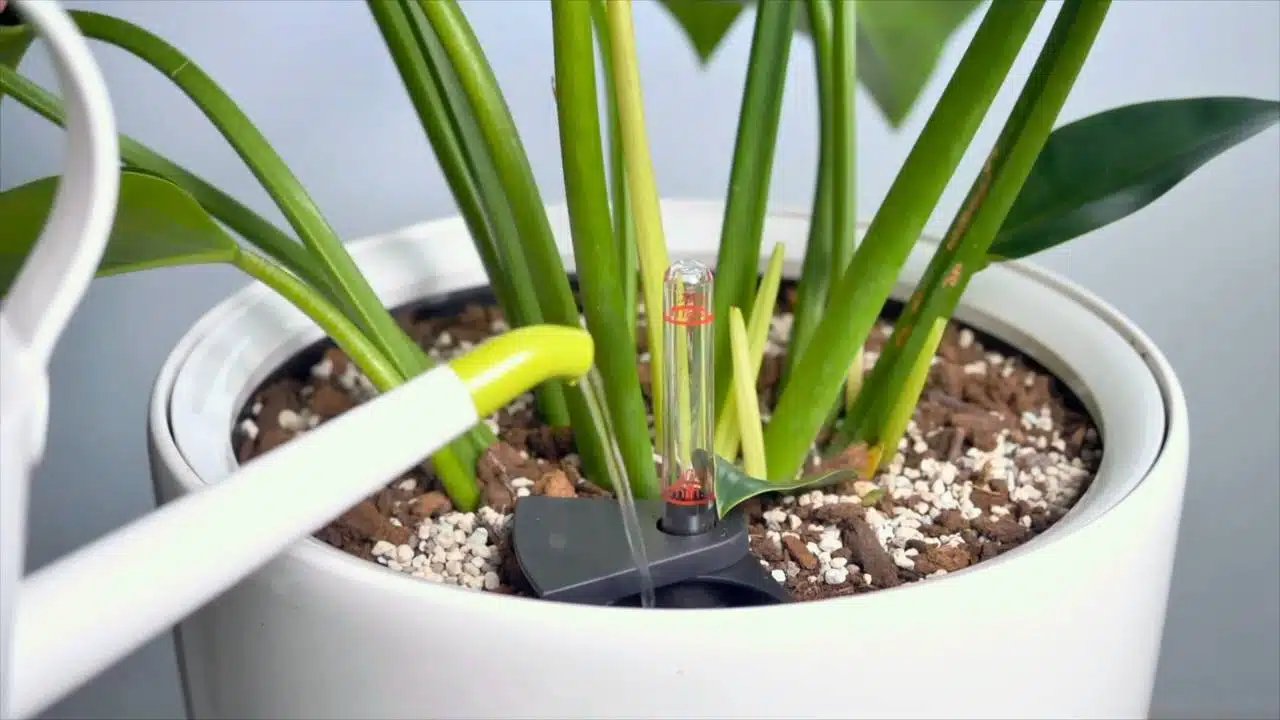
Wait until the indicator drops to the minimum level and start testing the soil. When the soil is dry enough, refill the reservoir until the indicator reaches the maximum level. Repeat this cycle as needed to maintain optimal moisture levels for your plant.
Remember, the self-watering feature can only be utilized after 3-4 months, as the roots require time to grow and access the water reservoir.
During the initial 3-4 months, you should water your Bird of Paradise plants in Lechuza planters directly through the soil, just as you would with plants in regular pots.
To learn more about how to water plants in Lechuza planters read my detailed post.
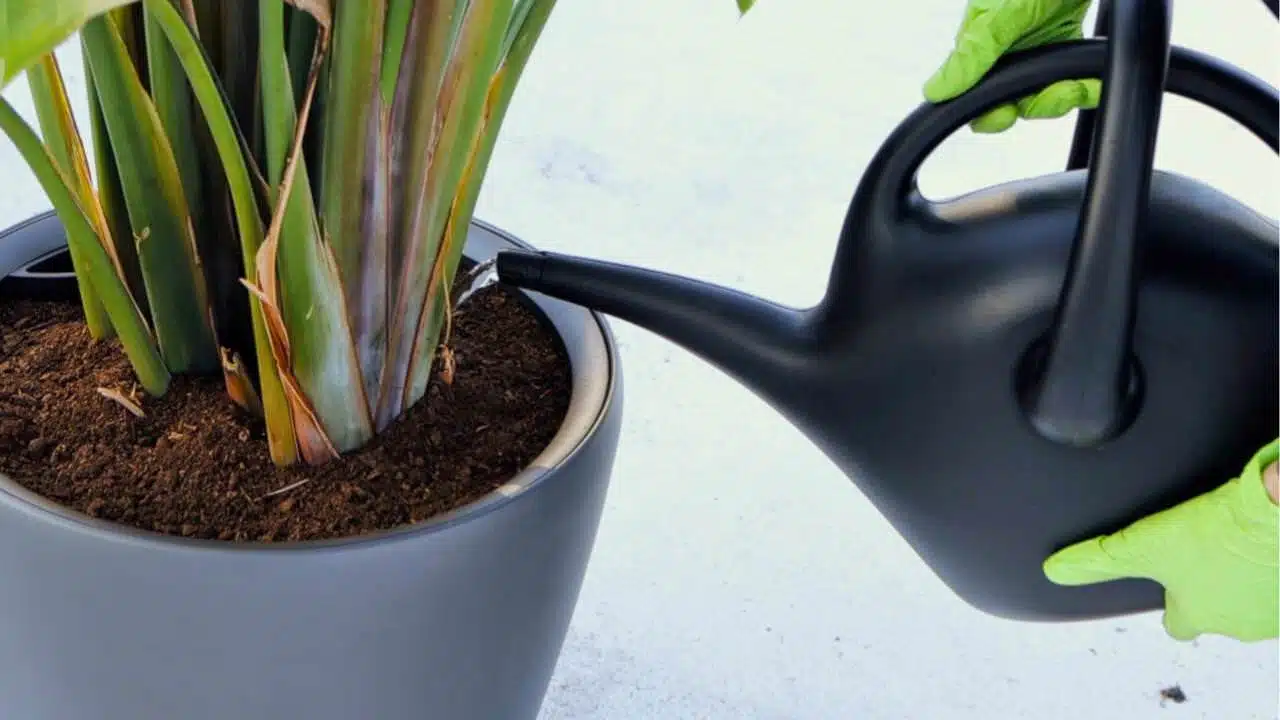
How to water Bird of Paradise plants in planters with drainage
Begin by assessing the moisture level of the soil near the plant’s base. Test the soil as deep as possible, and, if it feels dry to the touch, water the plant.
When watering, use a gentle flow from a watering can around the plant’s base. Water slowly and evenly to allow the soil to absorb moisture gradually, ensuring deep watering and preventing runoffs.
Be sure to empty any saucers or trays underneath the pot to prevent the plant from sitting in standing water.
Monitor the soil moisture regularly and adjust your watering frequency based on environmental conditions.
How to water Bird of Paradise plants in cache pots
If you choose to use cache pots (decorative pots without drainage holes), I strongly advise against potting plants directly into them. This is because cache pots don’t have drainage holes, which means water doesn’t escape as easily and can accumulate at the bottom, potentially leading to waterlogged soil and root rot.
*** It is best to keep the plant potted in its original nursery pot with drainage holes and place it inside the cache pot.
Before watering, test the soil as deep as possible, and, if it feels dry to the touch, water the plant.
When watering plants that are placed into cache pots, remove the plant from the cache pot before watering.

Water the plant thoroughly until water begins to drain from the bottom of the nursery pot. Allow the excess water to drain away completely before placing the plant back into the cache pot. This prevents water from pooling at the base, which could lead to root rot.
If your plant is potted in a cache pot, the watering frequency will typically be lower compared to if it were in a standard pot with drainage holes. It’s important to allow the soil to dry out more before watering to prevent water from pooling at the bottom and allow for better air circulation around the roots.
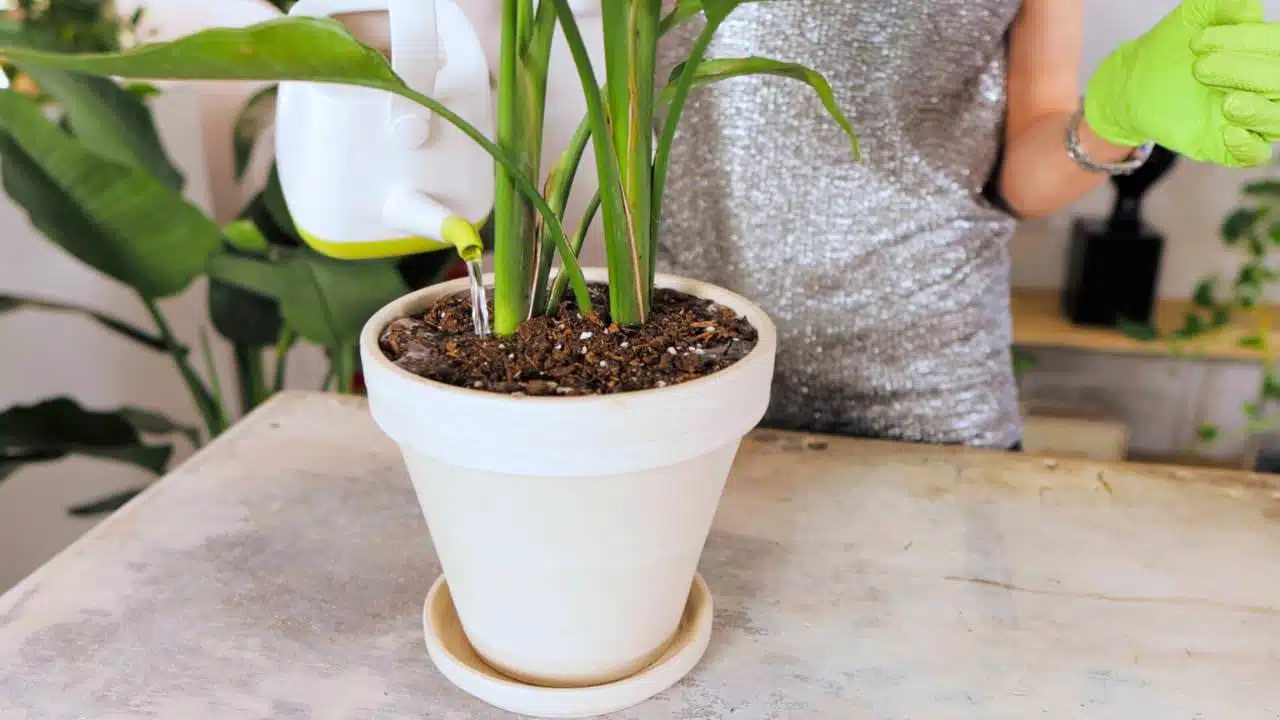
How to water Bird of Paradise plants in nursery pots
To water a Bird of Paradise plant in a nursery pot, first, check the soil moisture as deep as possible. If it’s dry to the touch, it’s time to water.
Place the nursery pot on a large tray, sink, or in the bathtub to catch excess water, then water the plant slowly and thoroughly until water starts to drain out from the bottom of the pot.
This ensures that the entire root ball is adequately moistened. Allow the excess water to drain away completely before returning the pot to its usual location. Monitor the soil moisture regularly and adjust your watering frequency as needed based on environmental conditions.
Potting and repotting
For successful growth, Bird of Paradise plants require proper potting and timely repotting. This section will provide you with essential information to ensure your Bird of Paradise thrives and reaches its full blooming potential.
Best planters for Bird of Paradise plants
The best planters for Bird of Paradise plants are typically large containers with sub-irrigation systems or drainage holes at the bottom. These plants have extensive root systems and require ample space to grow, so choose a planter that is at least 3-5 inches wider than the plant’s root ball.
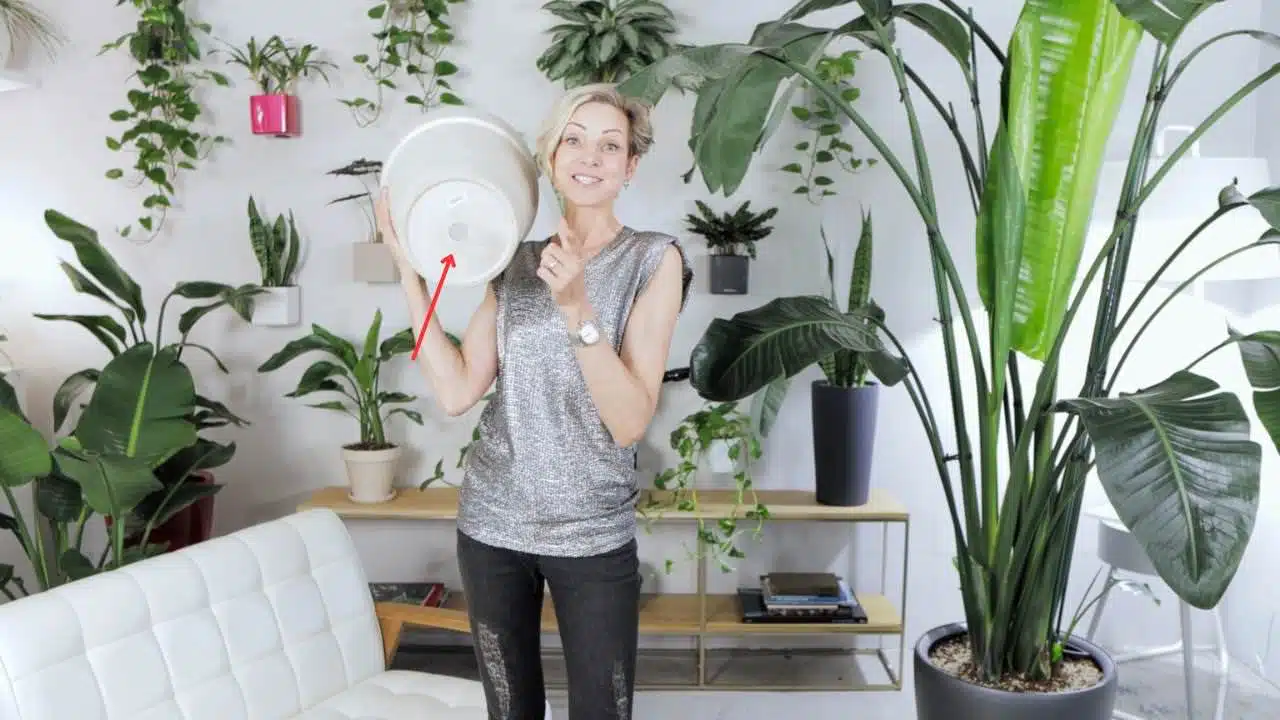
Drainage: Ensure the planter has drainage holes to prevent waterlogging.
Materials like ceramic, clay, or lightweight plastic can work well, but ensure the planter is sturdy enough to support the plant’s weight as it grows. Additionally, consider the aesthetic of the planter to complement the Bird of Paradise’s striking foliage and tropical vibe.
I do not recommend using metal planters for Bird Of Paradise plants as they conduct heat, risking root damage in sunny or warm areas.
Limited drainage may lead to root rot, while corrosion over time affects longevity and appearance. Additionally, their weight makes these planters hard to move within indoor spaces.
Best soil for Bird of Paradise plants
Choosing the right soil is essential for the health and growth of Bird of Paradise plants.
A well-draining potting mix specifically formulated for tropical plants is ideal.
Search for a blend that includes elements such as biochar, perlite, and pine bark, as these ingredients aid in enhancing drainage while maintaining moisture levels.
Avoid heavy soils that retain too much water, as they can lead to root rot.
Overall, selecting a well-balanced potting mix that provides both adequate drainage and moisture retention will create optimal growing conditions for your Bird of Paradise plant.
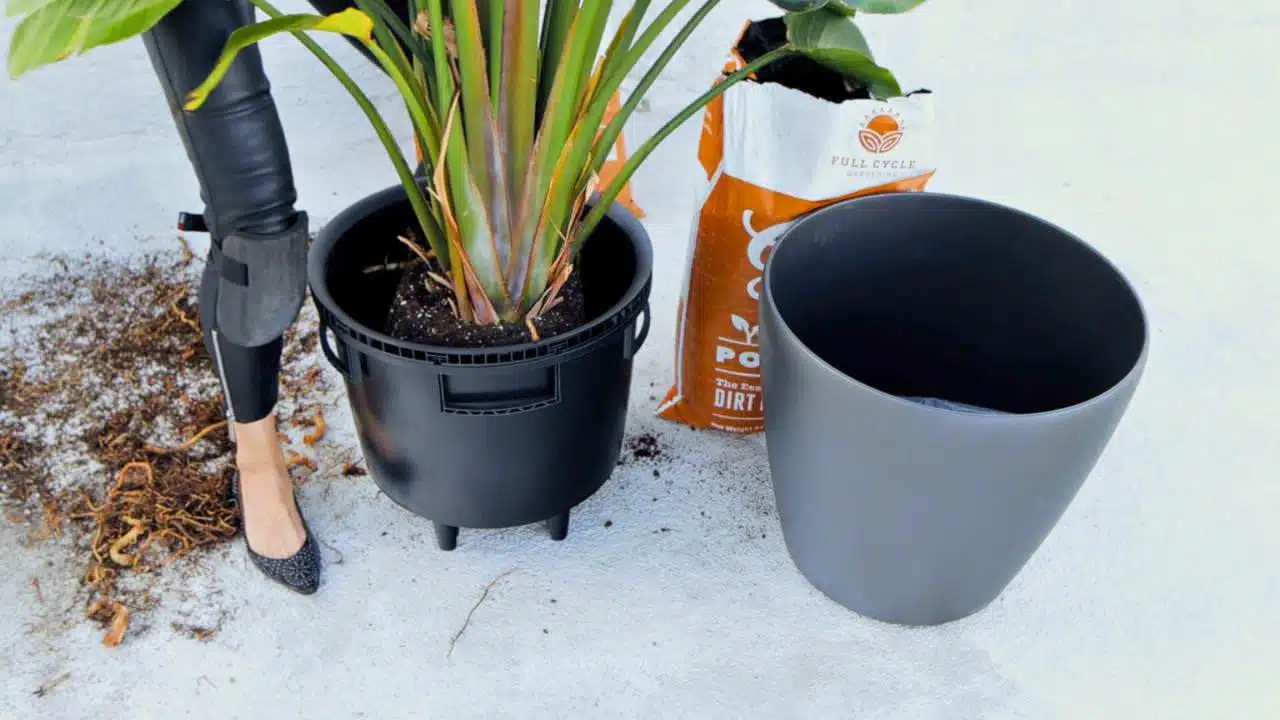
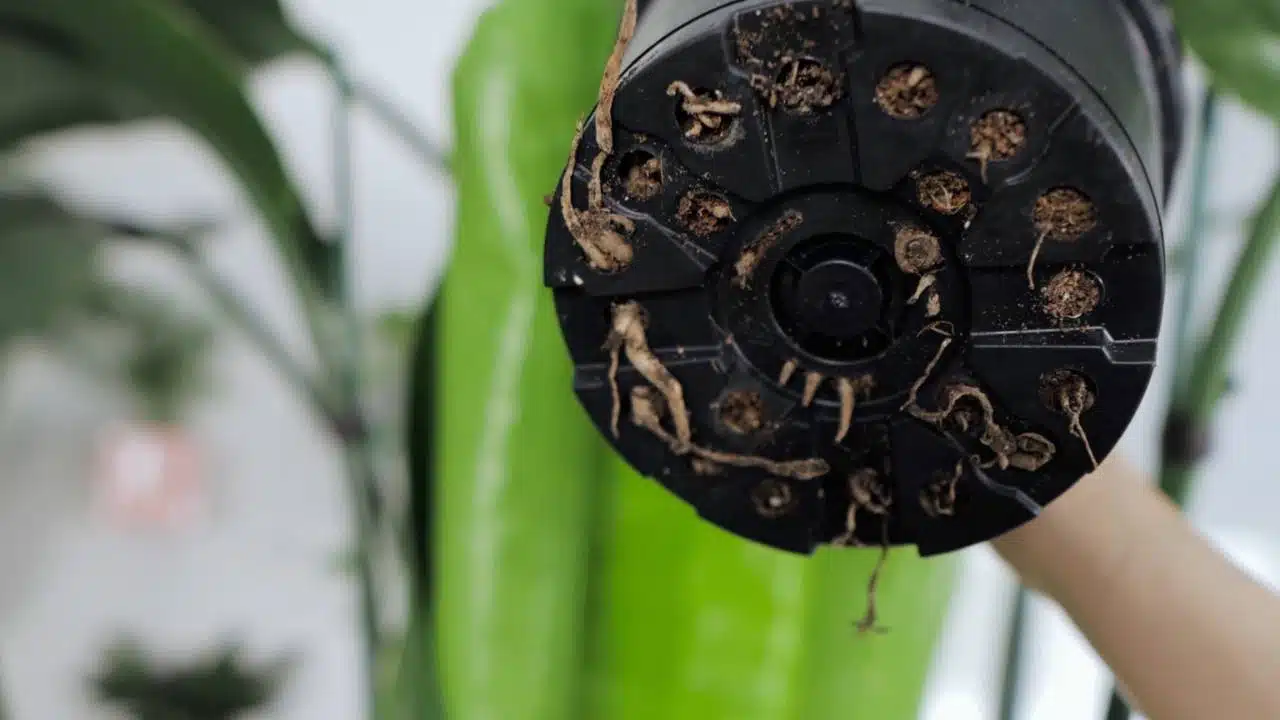
When to repot Bird of Paradise plants
Repot your Bird of Paradise when it becomes root-bound or the soil looks exhausted. This is usually evident when growth slows down, typically once every 2 years.
Repotting steps:
- Prepare: Choose a new pot that is 3-5 inches larger in diameter than the current one with adequate drainage.
- Remove: Carefully slide the plant out of its current pot, minimizing harm to the root ball.
- Inspect: Trim any dead roots and untangle them if necessary.
- Replant: Place the plant in the new pot and fill it with well-draining soil.
How to repot overgrown Bird of Paradise plant
You may simply repot an overgrown plant into a larger pot but if you lack space for a larger pot, consider dividing an overgrown plant during repotting.
Repotting steps:
- Carefully remove the plant from its current pot, gently loosening the root ball.
- Divide the root ball into smaller sections, ensuring each section has healthy roots and foliage.
- Repot each section into its own container. Choose pots that are 3-5 inches larger in diameter than the root ball to allow for ample room for growth.
- Fill each pot with fresh, well-draining soil.
- Water the newly potted sections thoroughly and place them in suitable light conditions for their specific needs.
Common issues with Bird of Paradise plants
Common issues such as yellowing, browning, curling, splitting of the leaves, and bending stems in Bird of Paradise plants can be the result of different factors.
Yellowing Bird of Paradise leaves
Yellowing of Bird of Paradise leaves can indicate various issues, including root bound, overwatering, underwatering, nutrient deficiencies, or diseases.
While overwatering can lead to root rot and subsequent yellowing, underwatering can result in dehydration and nutrient deficiencies, both of which manifest as yellowing leaves.
Additionally, diseases like fusarium wilt or bacterial leaf blight can cause yellowing along with other symptoms such as wilting or leaf spots.
It’s essential to assess the plant’s overall health and growing conditions to determine the underlying cause of yellowing.
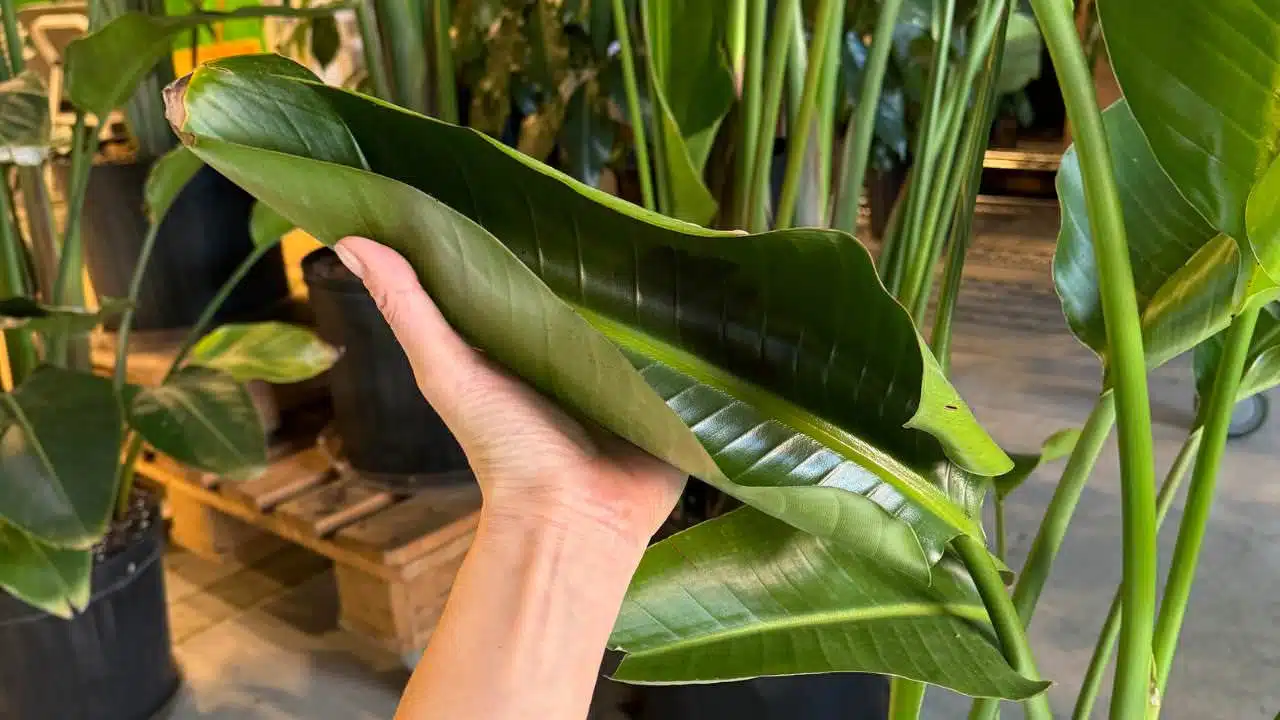
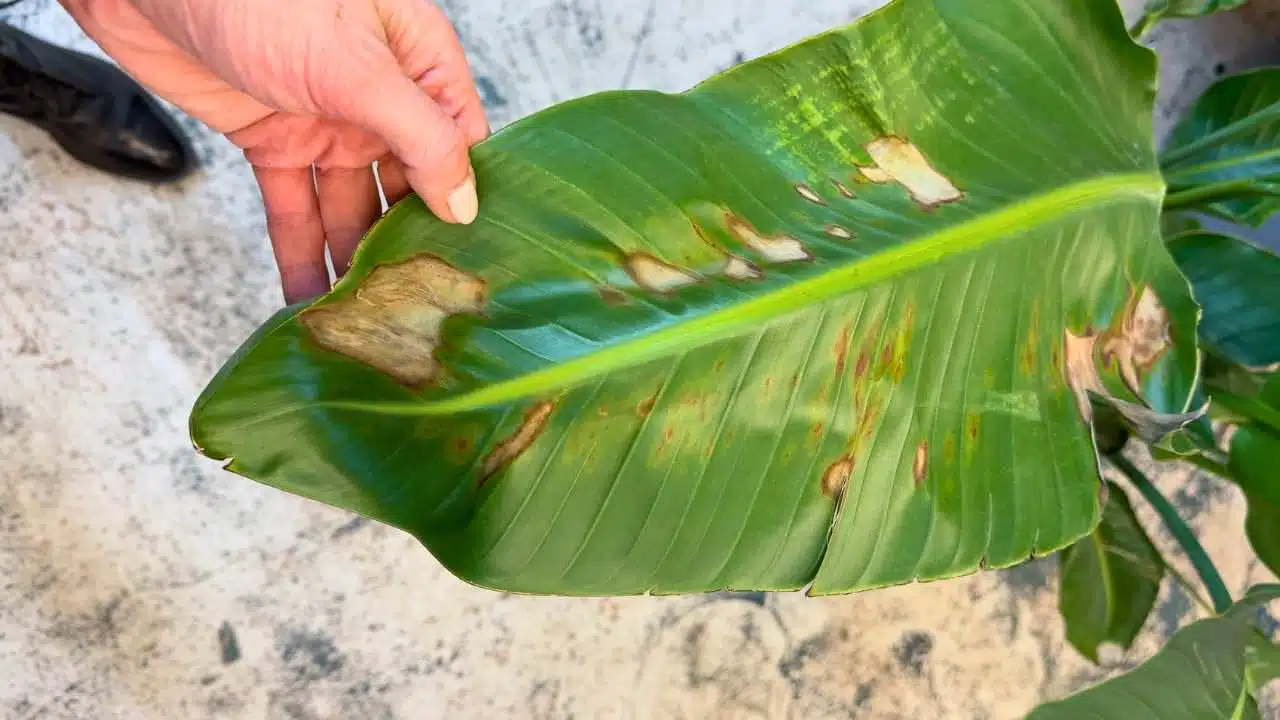
Browning Bird of Paradise leaves
Browning of the leaves, along with crispy tips, may occur due to underwatering, low humidity, or exposure to extreme temperatures, including cold drafts or hot air.
Adjust watering practices to maintain adequate moisture levels without overwatering, and ensure the plant is situated away from sources of cold or hot air to prevent further damage.
Dry brown patches on the leaves may be caused by low humidity levels.
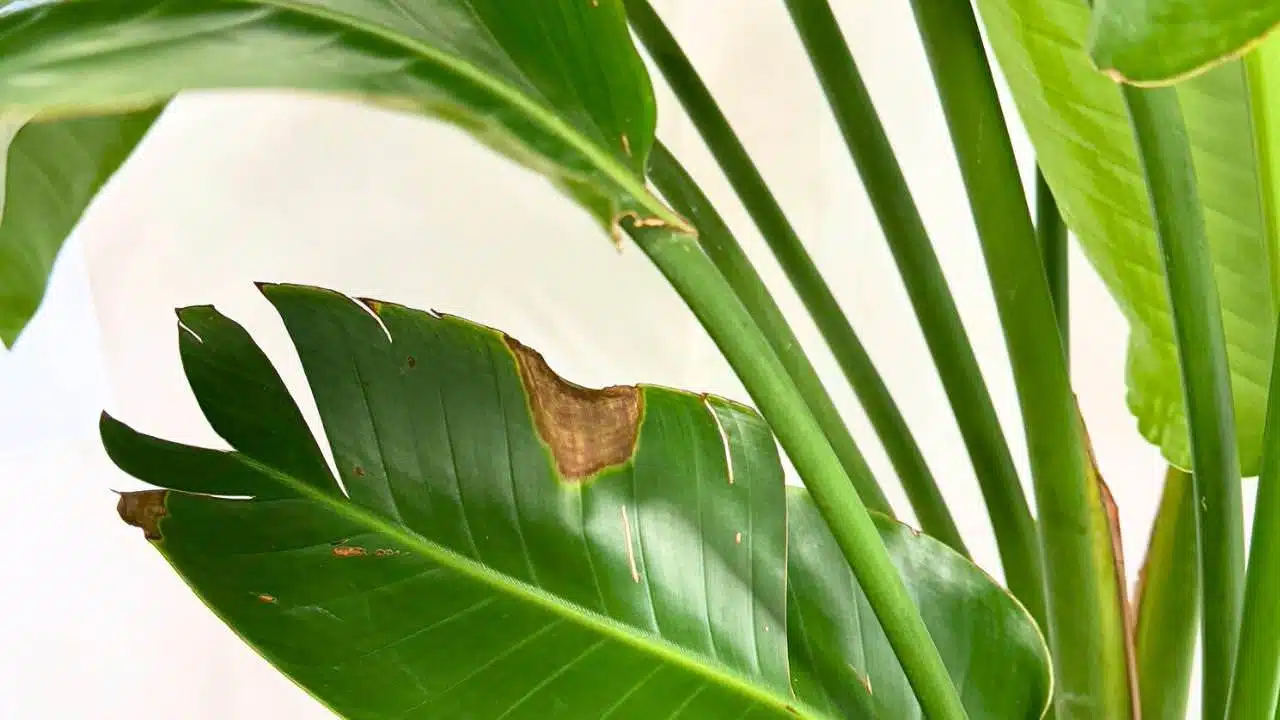
Low humidity can lead to moisture loss from the leaves, resulting in dry and brown patches.
Increase humidity around the plant by placing a humidifier nearby, or by grouping plants together to create a more humid microclimate.
Dry brown patches on the leaves may also indicate sunburn, particularly if the plant has been exposed to direct sunlight for extended periods, especially during hot weather.
To prevent sunburn, gradually acclimate the plant to increased sunlight, provide shade during the hottest parts of the day, and place it in a location where it can receive bright but indirect light.
Browning of the leaves, with a soft or mushy texture, may indicate an overwatering or fungal infection. Overwatering can lead to root rot, causing the leaves to turn brown and become soft.
Ensure proper drainage and adjust watering practices to prevent waterlogged soil.
If a fungal infection is suspected, remove affected leaves and treat the plant with a suitable fungicide according to the product instructions.
Curling Bird of Paradise leaves
Leaf curling can be caused by environmental stressors like inadequate light, low humidity, or underwatering. Additionally, pest infestations or diseases can also cause leaf curling.
To address leaf curling, ensure the plant is adequately watered, placed in a location with sufficient bright light, and inspected regularly for signs of pests or diseases.
Splitting Bird of Paradise leaves

Some splitting is normal and part of the natural growth pattern of this plant.
Splitting of the leaves can occur due to physical damage, such as accidental tearing or bending. Handle the plant with care and avoid causing physical damage to the leaves.
Splitting of the leaves can also occur due to low humidity levels, which can lead to dryness and brittleness in the foliage. Increase humidity by placing a humidifier nearby or a pebble tray with water beneath the plant.
Weak stems
Weak, bending stems in plants like the Bird of Paradise can result from multiple factors:
Overfertilization can disrupt the balance of nutrients, leading to elongated and weak stems.
Inadequate light can cause stretching in search of light, resulting in weak stems unable to support the plant properly.
Improper watering, either too much or too little, can stress the plant and weaken its structural integrity.
For strong, upright stems in Bird of Paradise plants, balance fertilization, provide ample light, and maintain consistent watering.
Over-fertilization of Bird of Paradise plants
If a Bird of Paradise plant is overfertilized, several signs may indicate this issue:
Leaf burn: Excessive fertilizer can cause leaf edges or tips to become brown or scorched, resembling burn marks.
Leaf discoloration: The leaves may exhibit abnormal colorings, such as yellowing or browning, particularly at the tips or margins.
Weak stems: Weak stems, manifested by bending or drooping, may also occur due to overfertilization, as excessive nutrients can disrupt the balance of growth hormones and weaken the plant’s structural integrity.
However, it’s important to note that weak stems can also result from other factors such as inadequate light and improper watering.
Stunted growth: Instead of promoting healthy growth, too much fertilizer can inhibit root development and overall plant growth.
Soil salt buildup: Excessive fertilizer can cause salts to accumulate in the soil, leading to soil salinity issues, which can further damage the plant’s roots and hinder nutrient uptake.
By addressing these issues promptly and providing proper care, you can help your Bird of Paradise plant recover and maintain its health and vitality.
Extra Tip: When using synthetic or chemical fertilizers for indoor plants, it is generally recommended to use half of the recommended dose to avoid over-fertilizing.
Under-fertilization of Bird of Paradise plants
If your indoor Bird of Paradise plant is not over-fertilized and receives proper light and watering but does not look healthy, you might have an under-fertilization issue.
Here are some common indicators:
- Slow growth: Plants often exhibit slower growth compared to healthy, well-fertilized plants.
- Pale leaves: Pale or yellowing leaves can indicate nitrogen deficiency. Nitrogen is essential for chlorophyll production, and a lack of it can result in chlorosis, where the leaves lose their green color.
- Stunted appearance: Plants may appear stunted or smaller than expected for their age. Insufficient nutrients can inhibit overall plant development and result in a less robust appearance.
- Reduced flowering: Bird of Paradise plants may produce fewer or smaller flowers than usual. Insufficient nutrients can affect flower bud formation and development.
- Weak stems: Weak, spindly stems that struggle to support the weight of the foliage. Adequate nutrients are necessary for strong stem development and structural integrity.
If you notice any of these signs in your indoor Bird of Paradise plant, it may be a good idea to fertilize it.
Always follow the instructions on the fertilizer packaging, and be cautious not to over-fertilize, as this can also cause problems for the plant.
Extra tips:
- If your Bird of Paradise plant is under-fertilized but not in its active growing period (spring-summer), you can still feed it during the slow-growing period (fall-winter), as indoor plants do not go completely dormant. When feeding plants during the fall-winter months, consider reducing the frequency from what is recommended on the label.
- When using synthetic or chemical fertilizers for indoor plants, it is generally recommended to use half of the recommended dose to avoid over-fertilizing.
How to prune Bird of Paradise plant
When your Bird of Paradise starts cramping its style by shooting up too tall or spreading out too wide, or if its leaves are showing battle scars from too much fertilizer, a sunbathing session gone wrong, or pest invasions, it’s pruning time!
Bird of Paradise pruning typically involves the selective removal of certain parts of the plant to promote healthier growth, maintain its shape, or remove dead or diseased portions.
This not only makes your plant healthier but also turns it into a real eye-catcher.
Pruning is more extensive and involves larger cuts to the plant compared to the trimming process.

Step-by-step guide:
- Prepare your tools: Ensure they are clean and sharp to avoid damaging the plant.
- Remove damaged or diseased leaves: Use sharp pruners or knife to make clean cuts near the base of the leaf stem when removing damaged or diseased leaves.
- Cut back old foliage: If your plant is getting too large, cut back the largest or tallest leaves as close to the base of the leaf stem as possible.
- Step Back and assess: Once you’ve completed pruning, step back and assess the plant’s overall appearance. Make any final adjustments as needed to achieve the desired shape and balance.
- Clean up: Clean up the soil from fallen plant materials and debris; dispose of the trimmed leaves to maintain tidiness and discourage pests.
To learn more about how to prune Bird of Paradise plants read our detailed Bird of Paradise pruning guide.
How to trim Bird of Paradise plants
The trimming process involves smaller, less invasive cuts compared to pruning.
It refers to light, regular maintenance tasks such as snipping off the tips of leaves, removing dying leaves, or cutting back small, unwanted growth to maintain the plant’s health and appearance.
During trimming, you may also remove small suckers that grow at the base of the plant and can sometimes compete with the main plant for root space, nutrients, and resources.
Regular trimming helps minimize maintenance and helps plants stay healthy for several reasons:
Preventing spread: Removing damaged or diseased leaves prevents the spread of disease or pests to other parts of the plant. This reduces the need for further treatment or intervention to control the spread.
Aesthetic maintenance: Regularly trimming keeps the plant looking tidy and attractive.
Resource allocation: By removing unhealthy leaves, the plant can allocate its resources more efficiently towards producing new, healthy growth rather than expending energy on maintaining damaged tissues.
When trimming your Bird of Paradise plant, it’s important to use the proper tools and techniques to ensure the best results and minimize damage to the plant.
Tools you’ll need:
Step-by-step guide:
- Inspect the plant. Begin by examining your Bird of Paradise plant closely. Look for any dead, damaged, or diseased leaves, as well as any unwanted growth.
- Prepare your tools: Ensure they are clean and sharp to avoid damaging the plant.
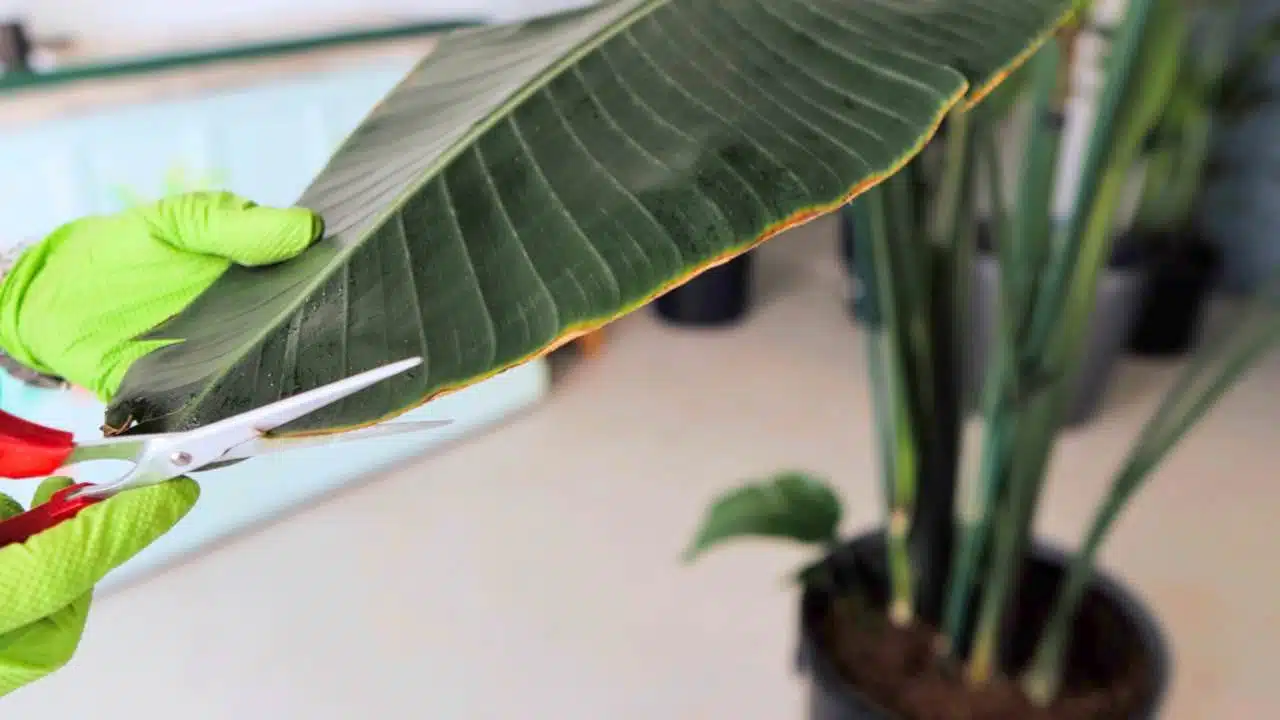
- Trim leaves: Use your sharp scissors to carefully trim away dead or damaged tips and edges of leaves. Follow the leaf’s natural shape when trimming to ensure a more aesthetically pleasing result.
- Remove dead or damaged leaves: Use sharp pruners to make clean cuts near the base of the leaf stem when removing damaged leaves completely to promote healthy growth.
- Cut back overgrowth: If your Bird of Paradise has overgrown suckers, use your pruners to cut them back. Aim to remove any growth that is disrupting the plant’s overall shape or competing for space and resources.
- Step back and assess: After the trimming process is completed, step back and take a look at your plant. Make any final adjustments as needed to achieve the desired shape and balance.
- Clean up: Dispose of the trimmed leaves; clean up the soil from fallen plant materials and debris to maintain tidiness and discourage pests.
Additional tips:
- Do not use dull tools as they can damage the plant.
- Cut back any overgrown leaves to maintain the desired shape.
- Removing any dead foliage prevents fungal infections and disease.
How to straighten Bird of Paradise plants
When your Bird of Paradise begins to lean, it can affect both the plant’s health and aesthetics.
To straighten a leaning Bird of Paradise plant, inspect the cause (uneven light exposure or being root-bound) and apply suitable remedies, such as rotating the plant for even light or repotting it into a larger container.
Utilize staking by inserting a stake near the main stem and tying the plant at various points, ensuring to loosen ties as the plant grows to prevent stem compression.
For repositioning, remove some soil, straighten the plant, and then refill and water the soil for stability, monitoring, and adjusting as needed.
Ensure the plant has well-draining soil and avoid over-watering to prevent root rot.
For large plants, consider a robust support system like a trellis.
Read my detailed guide and learn how I straighten Bird of Paradise plants and provide support to leaning leaves.
How to propagate Bird of Paradise plants
Propagating Bird of Paradise plants is a rewarding experience, offering the opportunity to multiply these beautiful plants and expand your indoor jungle. With the right techniques and a little patience, you can successfully propagate Bird Of Paradise plants.
The propagation of Bird of Paradise plants can be accomplished through seeds or division.
Personally, I’m not a big fan of seed propagation. It’s a labor-intensive and time-consuming process. I prefer faster results, which is why I exclusively propagate Bird of Paradise plants using the division technique.
Division propagation is a reliable method for multiplying your Bird of Paradise plant collection. With careful handling, you can divide mature plants into smaller sections, each capable of thriving independently and enhancing your indoor jungle. Easy process and fast results!
Explore the technique of dividing Bird of Paradise plants with my simple guide. I’ll walk you through creating four plant arrangements from a single plant.
Steps for division propagation method
- Plant health: Begin with a healthy parent plant to ensure successful division. Choose a mature plant with vigorous growth and well-established roots.
- Timing: Division is best done during the plant’s active growing season, typically in spring or early summer.
- Prepare the plant: Water the plant thoroughly a day or two before dividing it to hydrate the roots and make the process easier.
- Dividing: Carefully remove the Bird of Paradise plant from its pot. Use a sharp, sterilized knife or garden tool to divide the plant into sections, ensuring each section has a good portion of roots and healthy growth.
- Potting: Plant each divided section into its own pot filled with well-draining potting mix. Position the plant at the same depth as it was previously planted and water thoroughly. Make sure each pot has drainage.
- Placement: Place the newly potted divisions in a warm, bright-light location. Avoid direct sun exposure.
- Watering and care: Keep the soil consistently moist but not waterlogged in the weeks following division. Monitor the plants closely for signs of stress or dehydration and adjust watering as needed.
- Patience: Allow the divided plants time to acclimate to their new pots and growing conditions. It may take a few weeks for them to establish roots and resume growth.
How to fertilize Bird of Paradise plants
Fertilizing your Bird of Paradise plants is essential for vibrant growth.
When to fertilize Bird of Paradise plants:
Fertilize your Bird of Paradise from March till September during the growing season.
Avoid fertilizing in fall and winter when plant growth naturally slows down.
Type of fertilizer:
For a Bird of Paradise plant, you’ll want to use a balanced water-soluble fertilizer with equal parts nitrogen, phosphorus, and potassium. This type of fertilizer is specifically formulated for indoor plants or tropical foliage plants like the Bird of Paradise, providing the necessary nutrients for healthy growth and blooming.
Organic fertilizers are particularly effective for Bird of Paradise plant care. They not only provide essential nutrients but also create a thriving ecosystem below the soil surface, promoting overall plant health and growth.
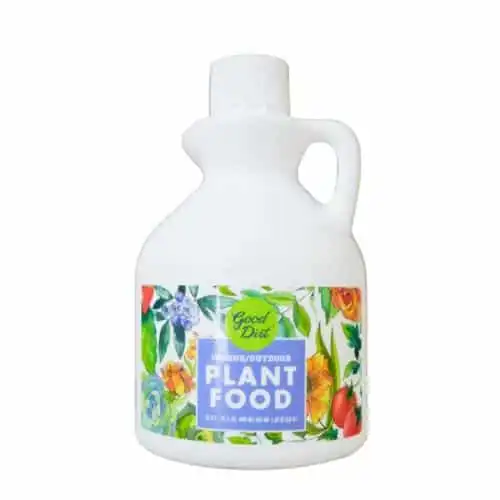
My favorite fertilizer
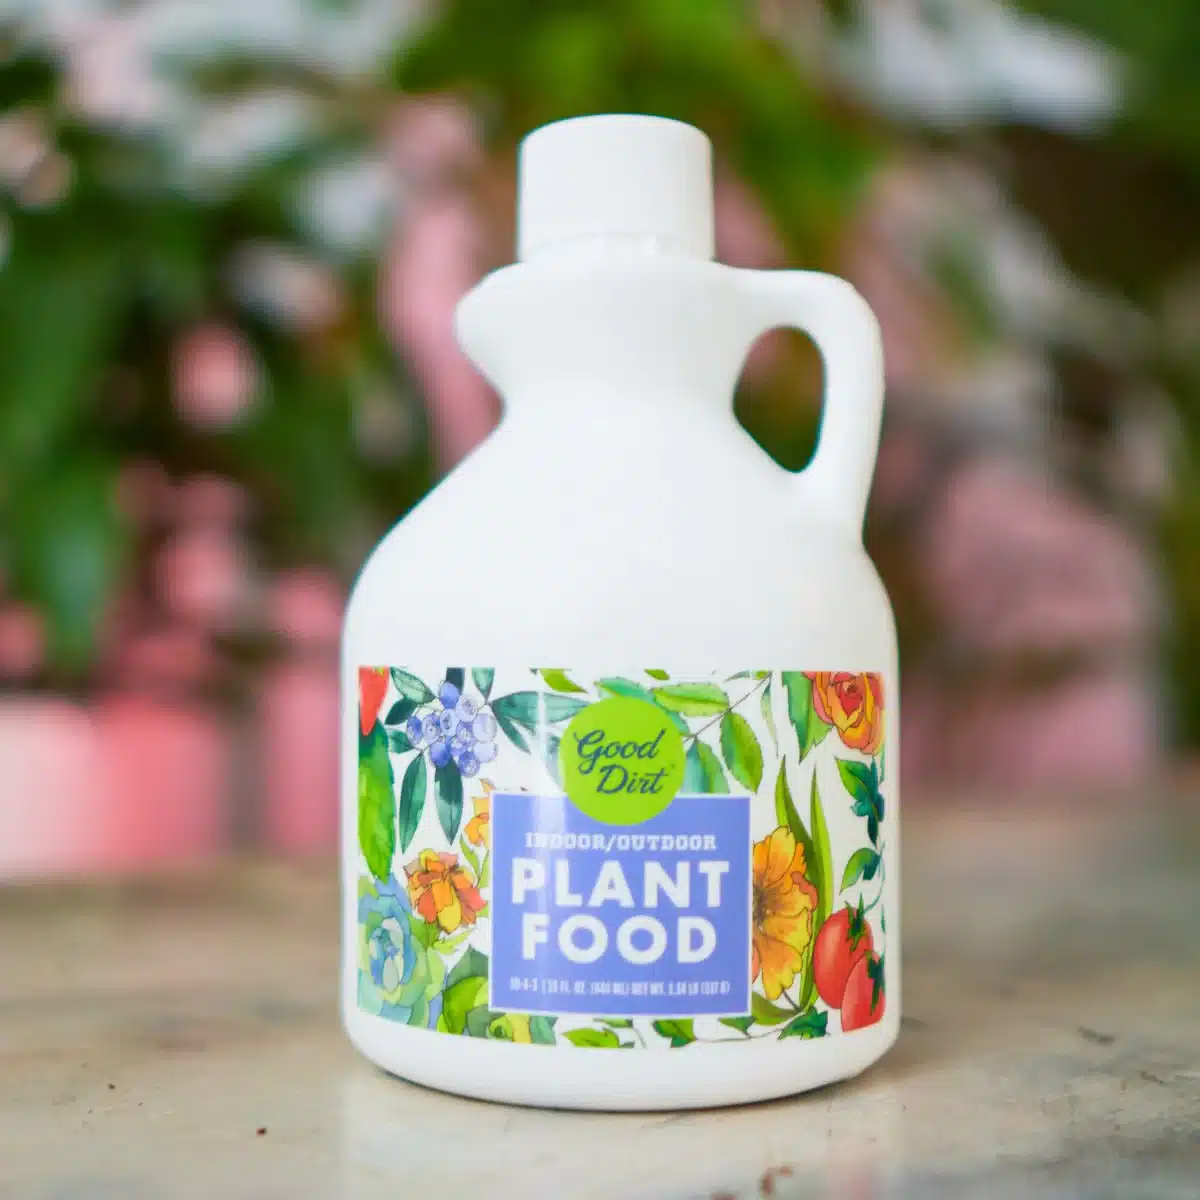
The Good Dirt plant food is my favorite fertilizer for Bird of Paradise plants grown indoors. I’ve been using this plant food for many years and couldn’t be happier.
This plant food contains oilseed extract, a renewable source of plant nutrition that contains amino acids known to improve overall plant health. It is not GMO, pathogen-free and heavy metals-free. Gentle on plants – no root burn issues.
Guidelines for fertilizing your Bird of Paradise:
- Frequency: Fertilize your Bird of Paradise plant during the growing season.
- Dilution: Dilute the fertilizer according to the instructions on the packaging. Avoid over-fertilizing, as this can lead to fertilizer burn or nutrient toxicity.
When using synthetic or chemical fertilizers for indoor plants, it is generally recommended to use half of the recommended dose to avoid over-fertilizing.
- Moisten the soil: Ensure the soil is evenly moist (but not saturated) before applying the fertilizer to prevent root burn.
- Application: Apply the diluted fertilizer to the soil around the base of the plant.
- Winter care: Stop fertilizing during the plant’s dormant period in winter when growth slows down.
- Observation: Monitor the plant for any signs of nutrient deficiencies or excesses. Adjust your fertilizing regimen accordingly.
Always follow the instructions on the fertilizer packaging for best results, and remember that proper watering and light conditions are also essential for the health and growth of your Bird of Paradise plant.
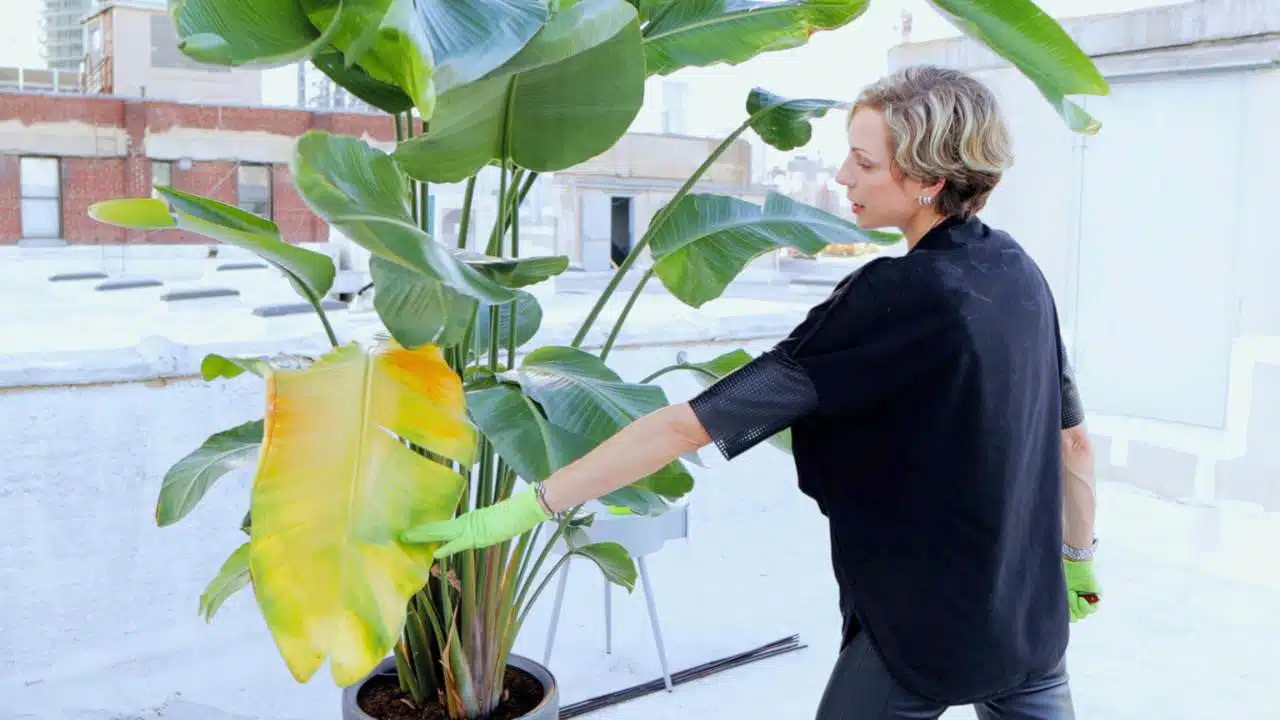
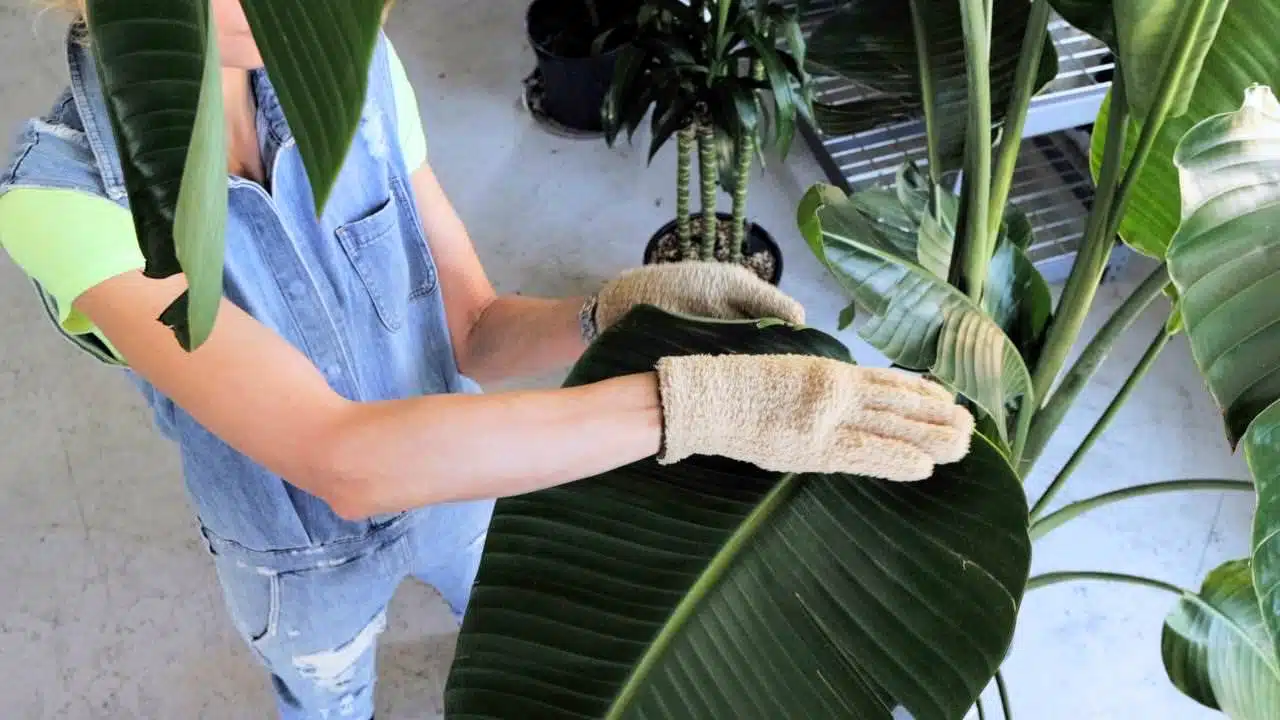
How to clean Bird of Paradise plants
Cleaning your Bird of Paradise plants is essential for their health and aesthetic appeal. Dust and debris can hinder photosynthesis and make your plant susceptible to disease.
Follow the cleaning steps below to ensure your plant remains healthy and vibrant.
Steps for cleaning
There are two dusting methods: dry and wet.
The choice between the two methods depends on the desired level of cleanliness.
Dry dusting
Advantages:
- Quick and easy to perform.
- Does not require additional cleaning solutions or water.
Considerations:
- It may not effectively remove stubborn residue.
- Does not provide deep cleaning for the leaves.
Tools you’ll need:
A soft cloth or Microfiber dusting gloves or Swiffer duster can all be effective for dusting Bird of Paradise leaves.
Each option has its advantages:
- Soft cloth: A soft cloth, such as a cotton cloth or an old T-shirt, is gentle on leaves and can be reused after washing.
- Microfiber dusting gloves: Microfiber dusting gloves are convenient because they can be worn on your hands, allowing you to reach into tight spaces and contours more easily than a cloth. They are also reusable and can be washed for multiple uses.
- Swiffer duster: A Swiffer duster is designed specifically for dusting and often comes with disposable dusting cloths that attract and trap dust. They are convenient for quick cleaning and can reach high or difficult-to-access leaves with their extendable handles.
How to clean:
Gently wipe the leaves with a tool of your choice to remove dust.
Bi-weekly or monthly dusting is recommended.
Wet dusting
Advantages:
- Provides thorough cleaning, removing dust, dirt, and residue more effectively.
- Helps hydrate the leaves.
Considerations:
- Requires more time and effort compared to dry dusting.
- Excess water left on the leaves can lead to water spots or fungal growth if not dried properly.
Tools you’ll need:
- Soft cloth or sponge
- Gentle dish soap link to Dawn
- Bowl
How to clean:
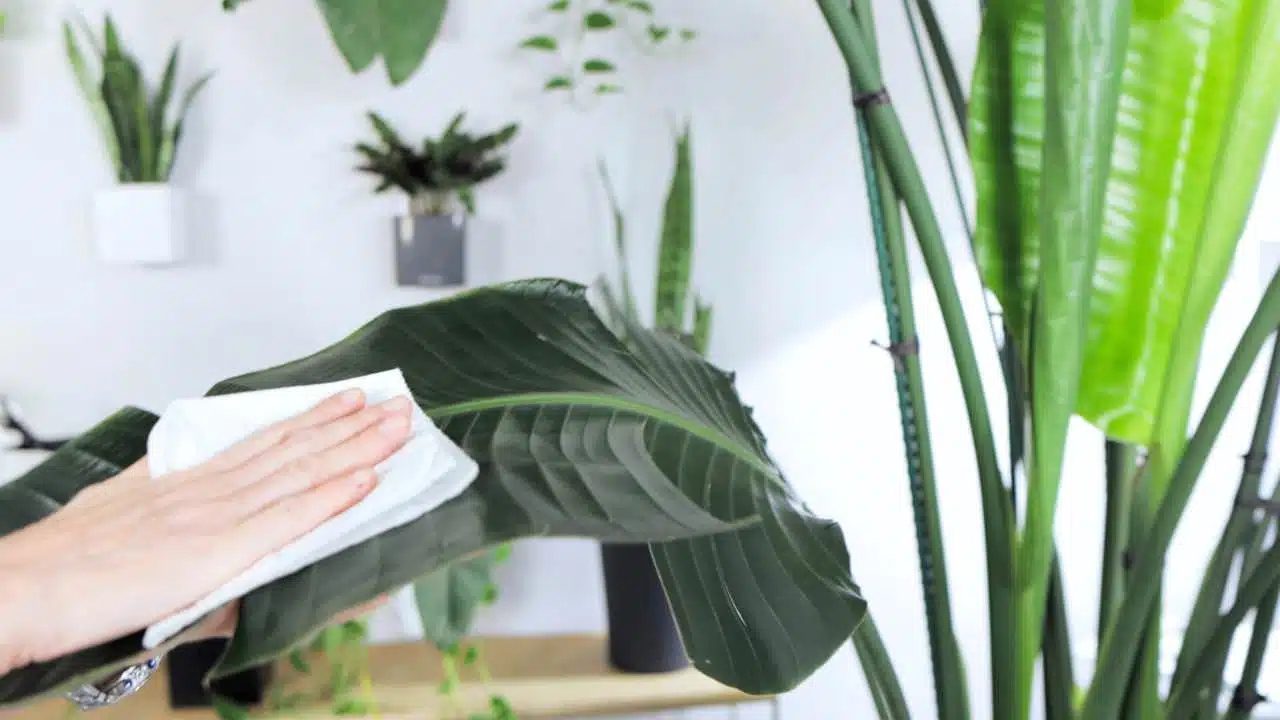
Wash
You can either use plain water or add a drop or two of gentle dish soap if your plants require a deeper cleaning to remove heavy dust buildup.
- Dip a cloth or sponge into the water, then lightly squeeze out excess water.
- Wipe each leaf (top and bottom) supporting it with your hand to avoid damage.
Rinse
If you have used a soapy mixture, use a damp cloth or sponge without soap to remove any soap residue from the plant leaves.
Make sure to squeeze out all water from the cloth or sponge to avoid leaving wet spots on the leaves.
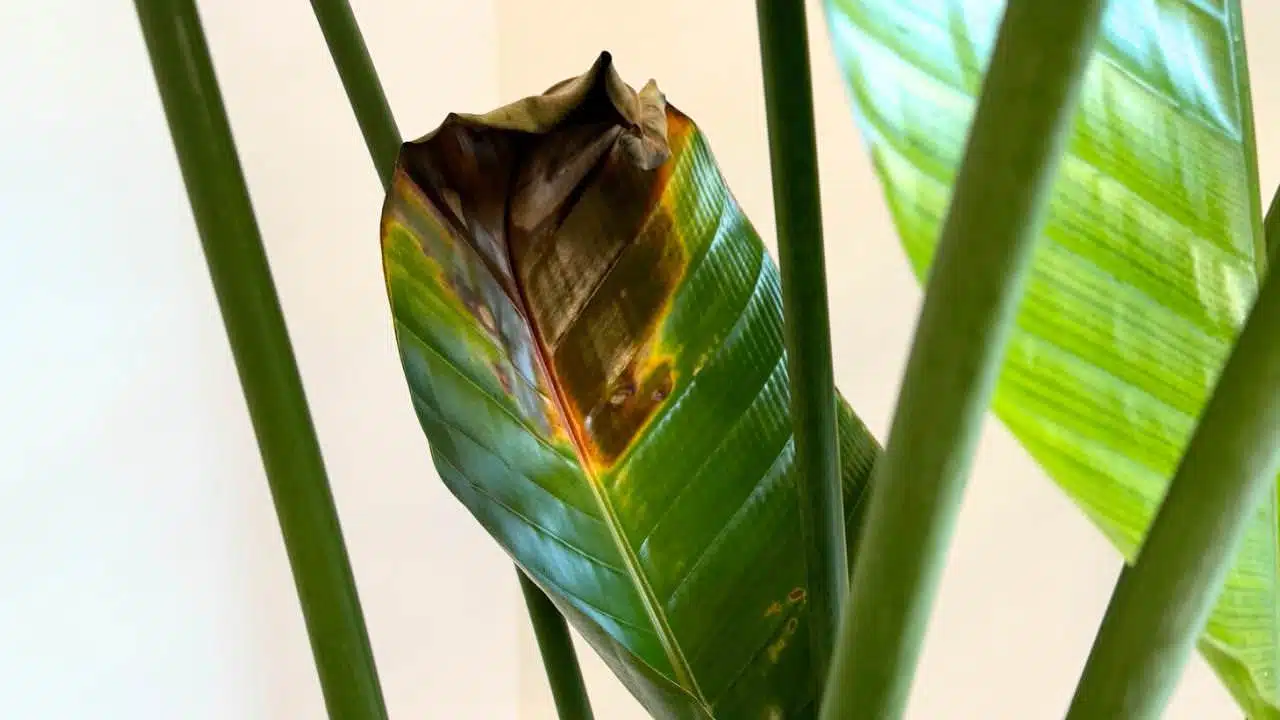
How to unfurl Bird of Paradise stuck leaves
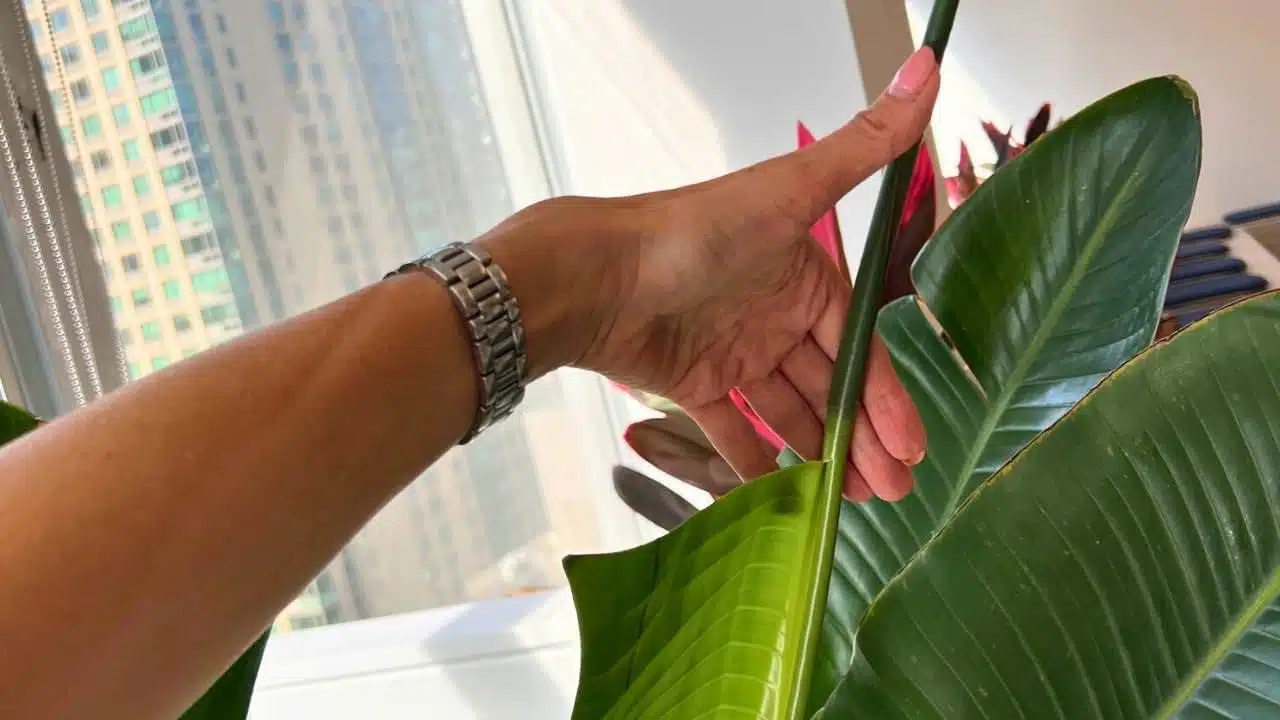
Tending to the majestic Bird of Paradise plant indoors can be a delightful journey, but like any adventure, it presents challenges along the way.
One day, you may find a new leaf stumbling in its attempt to unfurl, like a shy dancer hesitating before taking the stage. Fear not! It’s quite an easy problem to fix.
Generally, it may take anywhere from a few days to a couple of weeks for the new leaf to completely unfurl and reach its full size.
Inconsistent moisture levels in both the air and soil could be the reason why the leaf of your Bird of Paradise is stuck.
If it has been more than two weeks and the leaf of your Bird of Paradise is still tightly closed or if a new leaf is partially opened and ripped, your plant might need assistance.
If the entire leaf is tightly closed, I recommend misting the new leaf spike daily until the leaf starts to loosen up or wrapping the stuck leaf with a wet paper towel like in the image below.


If the lower part of the leaf is already torn, you can help the upper portion in unraveling by gently wiping it with a damp paper towel or cloth. Be cautious, as the leaf might loosen during this process.
You may also use the wiping technique to help a tight Bird of Paradise leaf unfurl.
Pests and disease management for Bird of Paradise plants
Common pests
Your Bird of Paradise may attract several pests that can hinder its growth and aesthetic appeal. Be watchful for mealybugs, spider mites, and scale, as these are the most frequent unwanted intruders.
Mealybugs present themselves as white, cottony masses on leaves and stems, sapping the plant’s vigor.
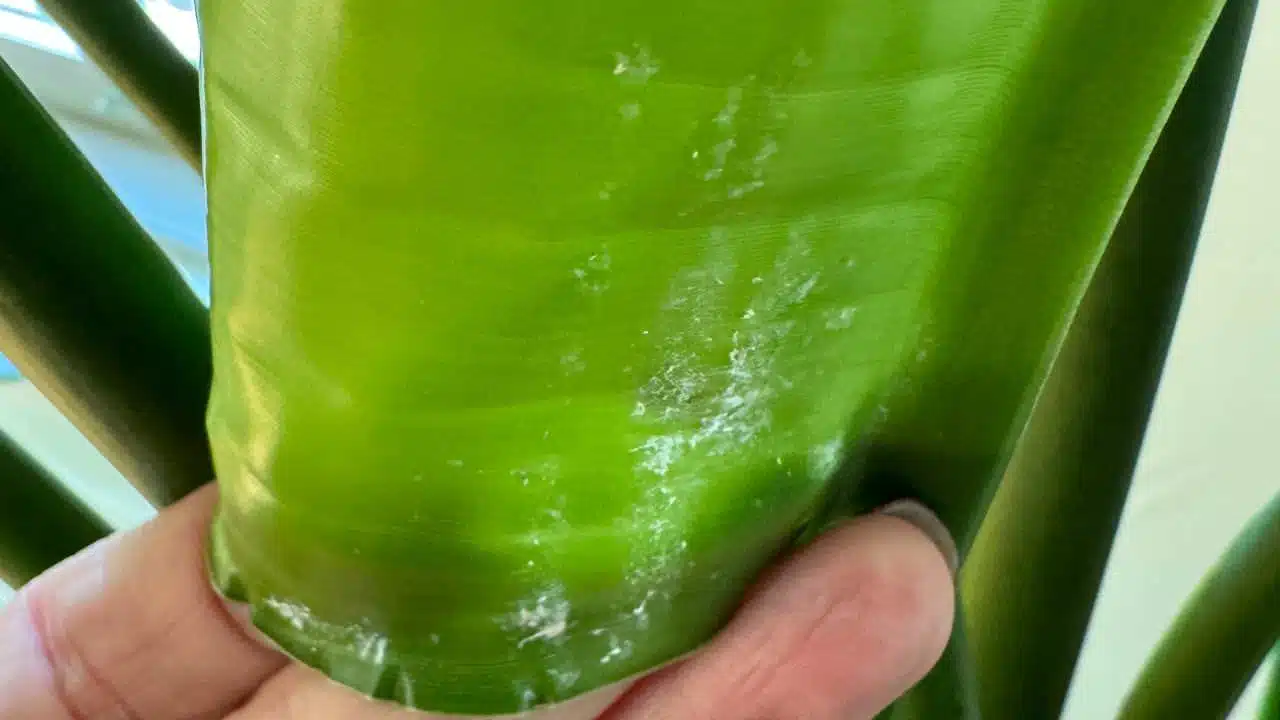
Spider mites appear as tiny specks, often reddish-brown or yellow, and can be found on the undersides of leaves. Infested leaves may show stippling or discoloration, and heavy infestations can lead to webbing on the plant.

Scale insects appear as tiny brown or black spots often found on the underside of leaves or on stems.
Tips to prevent infestation
- Inspect your plants regularly, focusing on the undersides of leaves and where leaves meet stems.
- Wipe down affected areas with a soft cloth dipped in soapy water or with an alcohol solution to remove mealybugs.
- Keep pots clean to prevent the buildup of debris and potential breeding grounds for pests and diseases.
- Separate an infested plant from all plants and begin treatment right away.
- Apply Neem oil as a preventive measure to control pest invasion. Lightly spray leaves, stems, and topsoil once every 2 weeks during spring-summer, when pests are the most active, or if you have an infested plant at home.
Common diseases
Despite their relative hardiness, Bird of Paradise plants can be susceptible to certain diseases if not properly cared for. These diseases can manifest as wilting, leaf spots, abnormal or fuzzy growth, discoloration, lesions on plant tissues, or other symptoms, depending on the specific pathogen involved.
Common diseases of Bird of Paradise plants include:
- Root rot: Caused by overwatering or poorly drained soil, leading to the roots becoming waterlogged and rotting. Symptoms include wilting, yellowing leaves, and stunted growth.
- Leaf spot: Fungal diseases like Alternaria or Cercospora can cause brown or black spots on the leaves, which may spread and eventually lead to the death of the affected leaves.
- Powdery mildew: A fungal disease that appears as white, powdery patches on the leaves, stems, or flowers. It can weaken the plant and cause leaf distortion if left untreated.
- Bacterial leaf blight: Caused by bacteria such as Pseudomonas or Xanthomonas, this disease manifests as water-soaked lesions on the leaves, which may turn brown or black and spread rapidly.
- Fusarium wilt: A fungal disease that affects the vascular system of the plant, leading to wilting, yellowing, and eventual death of the plant. It can be challenging to control once the plant is infected.
Tips to prevent and manage diseases
- Regularly remove dead or diseased plant material.
- Clean pruning tools between uses to prevent the spread of pathogens.
- Ensuring pots and containers are clean and free from debris.
- Maintain good air circulation.
- Avoid overwatering to prevent waterlogged conditions that can promote disease development.
- Quarantine new plants to prevent introducing pests and diseases to your existing collection.
- Monitor plants closely for signs of disease and take prompt action if any issues are detected.
- If you notice signs of disease, promptly remove and destroy affected plant parts and consider using fungicides or bactericides as directed on the label.
If pests or diseases have severely affected your plant, it may be necessary to remove and dispose of the affected areas to prevent further spread.
Regular monitoring and early intervention can help keep Bird of Paradise plants healthy and thriving.
Seasonal Bird of Paradise care tips
Knowing how to adapt your care and watering routine to different seasons is vital for your Bird of Paradise’s health. Seasons impact how your plant grows and thrives indoors. Warmer months often mean more growth, while colder ones may slow it down or even make it dormant.
The indoor environment can undergo various changes during different seasons:
- Temperature: During the summer months, temperatures indoors may rise due to warmer weather outside, leading to increased use of air conditioning systems. In contrast, winter brings cooler temperatures, requiring indoor heating to maintain comfort.
- Humidity: Summer often brings higher humidity levels, especially in regions with humid climates, which can affect indoor climate. Winter, on the other hand, tends to have lower humidity levels, which can lead to dry indoor air.
- Light: The amount of natural light entering indoor spaces also varies depending on the season. Longer daylight hours in summer can provide ample natural light, while shorter days in winter may result in reduced natural light exposure indoors.
Overall, understanding how the indoor environment shifts with the seasons can help you adjust the Bird of Paradise plant care routine to keep your plants comfortable and thriving year-round.
Spring and summer seasons
In the spring and summer, your Bird of Paradise enters a growth phase where it will benefit from increased sunlight and consistent feeding.
During the active growth period, it’s typical for watering frequency to increase. Be sure to adjust your watering schedule accordingly and check the soil more frequently to ensure your plants receive adequate moisture.
Bird of Paradise spring care tips
- Get your plants ready for Spring by giving them a deep cleaning.
- Prune overgrown stems and trim yellow/brown leaves.
- Add fresh soil if levels are low.
- Start fertilizing your plants.
- Lightly spray Neem oil once every 2-3 weeks to repel pests and prevent infestation.
- You can move your Bird of Paradise plants outdoors when the temperature is steady and consistently above 59°F (15°C).
Bird of Paradise summer care tips
- During the summer season avoid long exposure to direct sunlight. Place your plant in a location where it can receive bright, indirect sunlight.
- Test the soil moisture more frequently. Watering frequency is usually higher during this season.
- Continue fertilizing your plants.
- Keep spraying Neem oil once every 2-3 weeks to repel pests and prevent infestation.
- Use a humidifier to help increase humidity levels indoors, if they are low due to the use of air conditioning.
Fall and winter seasons
As the fall and winter seasons approach, it’s essential to adjust your care routine to ensure your beloved Bird of Paradise plants thrive despite the changing conditions.
With cooler temperatures and potentially drier air indoors, your plants may need some extra attention to maintain their health and vitality.
Bird of Paradise fall care tips
- Monitor soil moisture as temperatures cool, watering frequently will change.
- Provide adequate light. As daylight hours decrease in the fall, ensure your Bird of Paradise receives enough light by placing it near a bright window.
- Maintain humidity. Indoor heating during the fall can lead to dry indoor air.
- Monitor for pests. Fall is a time when certain pests are still or more active indoors like mealybugs and gnats.
- Bring plants indoors. Be sure to bring your Bird of Paradise plant back indoors before the temperature drops below 59°F (15°C).
Bird of Paradise winter care tips
- Keep away from cold drafts.
- Keep the temperature steady, ideally between 59°F (15°C) and 80F ( 26C ).
- Water less frequently; allow the soil to dry out more between watering.
- Do not fertilize.
- Maintain humidity. Use a humidifier or place a tray of water and pebbles near the plant.
- Keep your Bird of Paradise plant as close to a window as possible, or consider adding a grow light.
Want to learn more about Bird of Paradise Plant Care?
Check our other guides about Bird of Paradise care:
- How to prune Bird of Paradise plants.
- How to divide Bird of Paradise plants.
- How to straighten leaning Bird of Paradise plant.
- How to repot rootbound Bird of Paradise plant.
- How to pot and care for giant Bird of Paradise plant.